Bread is an integral part of our life, without which we cannot imagine our normal day, and all because it is universal.
For example, sandwiches can be made with anything and any kind: sweet ones - with honey, jam, condensed milk; hearty - with sausage and cheese, with sprats and cucumber, and so on.
This product is suitable for everything, and some people cannot even imagine a single meal without it; they say that without it, food becomes less tasty.
Useful and harmful qualities of yeast-free homemade bread
Pros:
The only disadvantage of preparing such a product is its taste, hardness and small size. The taste of yeast-free bread is lean, barely perceptible.
Often its density is much higher than that of store-bought yeast bread, and its taste may not be to everyone's taste.
How to prepare sourdough for homemade yeast-free bread
The basis of this type of baking is sourdough, on which the taste of the future bread bun directly depends.
So, to prepare the starter according to classic recipe we need:
- 1 glass clean drinking water;
- 1 cup flour (pre-sifted);
- A tablespoon of honey (optional).
This version of the starter is prepared in several stages, and, accordingly, over the course of several days.
Stage 1: take 100 g of flour (about a third of a glass), honey and a third of a glass of water. Cover the resulting mass with gauze or a waffle towel so that oxygen can penetrate freely and dust cannot.
We put it in a warm place for two days.
Stage 2: After two days, add another third cup of flour and the same amount of water to the starter. The reaction of the dough should be unambiguous: small air bubbles on the surface and a slight sour aroma of the dough.
Leave covered with a cloth in a warm place (for example, in the kitchen) for another day.
Stage 3: After 24 hours, the starter should acquire a distinct smell of alcohol and increase in size, add again a third of a glass of flour and the same amount of clean drinking water and leave it for the next day.
Stage 4 (final): After the last 24 hours, the starter should increase significantly in size. Now you can use it by adding a certain amount to the dough, having previously done some simple and well-known steps: a third of a glass of flour and the same amount of water, put in a warm place until signs of fermentation appear, that is, bubbles and an increase in volume.
The remaining mass is usually stored in a jar in the refrigerator. The consistency of this leaven looks like thick village sour cream, very viscous and elastic.
An elementary recipe for yeast-free bread in a bread machine
To make bread we need:
- half a glass of warm milk;
- 1 egg;
- butter– 1.5 tablespoons;
- half a teaspoon of salt;
- 2 tablespoons sugar (to taste);
- 3 cups flour (possibly heaped);
- 1 teaspoon baking powder (optional).
The entire process of making bread in a bread machine involves the correct sequence of loading the ingredients. First, pour warm milk into the bowl, then add the egg, then add butter, salt and sugar.
For better mixing, the butter can be melted or softened. And finally, flour with baking powder.
All that remains is to choose the size and color of the bread bun, as well as correct mode, for example "fast". This bread usually takes an hour and a half to bake.
The bread maker will let you know when the bread is ready with a specific sound signal.
It is best to take out the bread when it has cooled and only then cut it. The job is done, ladies and gentlemen, homemade yeast-free bread is ready to eat.
Lenten yeast-free bread in the oven
Unfortunately, not every housewife has a bread machine, so we offer a recipe for making this healthy bread in the oven. This will not change the taste at all, and the simplicity of the recipe will pleasantly surprise you.
So let's get started:
- 1 glass rye flour(coarse grind);
- one third cup of wheat flour (coarsely ground);
- 2 glasses of kefir;
- 2 tablespoons bran (optional);
- 1 tablespoon sugar;
- 1 teaspoon salt;
- 1 teaspoon of soda;
- 1 tablespoon melted butter or margarine.
Preheat the oven to 200 degrees and start creating. Place all dry ingredients in a deep bowl and pour in 1 cup of kefir. 
Knead the dough, steep, dense and practically not sticky. You may not need a second glass in full. When adding kefir, be guided by the recommended state of the dough.
It is better to choose the form for the future bread in advance. It is convenient to use both silicone and metal molds, the only criterion in your choice should be its depth.
The deeper the pan, the taller the loaf of bread will be. The dough should cover the mold by half.
Cover the selected form with parchment or baking paper, then lay out the dough, distributing it evenly over the entire form with hands moistened with water. As a topping for a homemade bun, you can use cumin, sesame seeds or oatmeal, which should be sprinkled on top of the bread.
Well, now we put our bread in the oven to bake until we see a golden crust, about 20-30 minutes, after which we take it out and wrap it in a towel. In this form, the bread must cool, then it will remain soft longer.
How to make yeast-free bread at home is described in detail in the video.
Cooking rye yeast-free bread in a slow cooker
To prepare we will need:
- one and a half glasses of wheat flour;
- half a glass of rye flour;
- half a glass oatmeal;
- 1 teaspoon salt;
- 1 teaspoon of soda;
- 1 tablespoon sugar;
- 1 glass of kefir;
- 2 tablespoons butter;
- 1 tablespoon breadcrumbs.
Combine melted butter with a glass of kefir. Combine all the dry ingredients of the recipe with the liquid ones and knead the dough.
You have to knead it quickly, otherwise it will become tougher.
Grease the multicooker bowl with oil and sprinkle with breadcrumbs. Now you can lay out the dough.
Then turn on the “Baking” mode and wait for the ready signal after half an hour. The bread needs to be turned over using an oven mitt or a knife and left to bake again for half an hour, but on the other side.
With this method, the bread is baked evenly on both sides.
The hot bread must be carefully removed from the multicooker and placed on a dish, then covered with a cloth towel and allowed to cool. Then the crust of the bread will be soft.
Delight your loved ones and yourself with cooled bread.
Monastic homemade yeast-free bread
To bring such bread to life, we will need a little free time, a good attitude and a bit of patience.
First, you should prepare the sourdough, since this is the type of yeast bread that is prepared on its basis. You can use the recipe for making sourdough given above, or try the one that church ministers usually use.
For the starter we need:
- warm brine (cucumber or cabbage without vinegar);
- a little rye flour;
- a small amount of sugar.
The amount of ingredients depends on the amount of bread you are going to bake. This starter can be prepared for future use, then it needs to be stored in the refrigerator.

Add flour to the warm brine and stir until a creamy consistency is formed, add a certain amount of sugar (to taste) and leave to rise in a warm place. The starter should rise several times, each time we stir it, releasing carbon dioxide and remember that the rising time is gradually decreasing.
After you have received the starter, you can start preparing the dough: mix warm water, sourdough, sugar and flour. The dough should be viscous and elastic, and resemble thick sour cream.
Let it sit, whisking occasionally if it rises.
Knead the dough for monastery bread, gradually adding flour, salt and, if necessary, sugar. Light and airy dough Divide into molds, filling only half of their volume.
Then leave the dough to rest for half an hour and you can put it in the oven.
To keep the crust soft and pliable without breaking, moisten the hot bread with a little water, cover with a clean, dry cloth and let it cool.
It is best to prepare the sourdough in advance and have a free day in reserve, since extra time never hurts, and in a hurry, you can chop wood and miss one of the ingredients.
All ingredients for each recipe must be fresh and on hand, as this is your personal masterpiece that deserves the best.
If in doubt, you can check the readiness of the bread using a toothpick. Pierce the finished loaf with it.
If there is dough left on the toothpick, then you need to wait a little longer and put the bread back in the oven.
You can learn how to make white yeast-free bread from the video.
- Oatmeal – 0.5 tbsp.;
- Wheat flour – 2 tbsp;
- Soda – 1 tsp;
- Salt – 1 tsp;
- Vinegar 6% - 1 tbsp. l.;
- Vegetable oil – 1 tbsp. l.;
- Milk – 300 ml.
Cooking process:
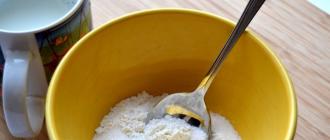
Pour all the dry ingredients into the dough container: sifted wheat and oatmeal, salt, soda. Instead of baking soda, you can use baking powder. All ingredients must be mixed so that there are no lumps left.

In the center you need to make a funnel and pour sour milk into it and vegetable oil. Using a spoon in a circular motion, gradually grabbing the dry mixture from the sides, combine it with the liquid.

Make a sticky dough. It should gather into a lump and not spread for several minutes. If the dough does not hold its shape well, then there is not enough flour and you can add 2-3 tbsp. l. The resulting mass must be kneaded thoroughly.

A round baking pan must be lined with baking paper. Place the dough on it in one lump and smooth its surface with wet hands.

The knife should be powdered with flour and made deep, cross-shaped cuts. They will prevent cracks in the bread. You can sprinkle oatmeal or wheat flour on top.

Bake soda bread in an oven preheated to 200 degrees for 45 minutes. Then the oven should be turned off, but not opened. Yeast-free bread must stand in it for another 10 minutes. After this, you need to transfer it to a wire rack and cover with a towel.

After 30 minutes, the soda bread is ready to eat.

It turns out to be quite heavy in weight, thanks to the finely porous crumb.

The crust remains soft and not crispy. Bread made with soda and kefir does not go stale for 2-3 days if you store it in a plastic bag.
How to cook delicious bread without yeast at home told Gayane, recipe and photo of the author.
You might be interested in:

Yeast-free baking has long been recognized by all experts as the safest and easiest, both in terms of health and for reasons of maintaining your figure. However, there are a number of dishes that are very difficult to imagine prepared without yeast. For example, bread. What then should be used to make the dough for it, and what will be the key to the splendor of its crumb? Is it even possible to bake bread in the oven without yeast?
How to bake bread without yeast at home in the oven?
Unleavened dough without any leavening component most often turns out very heavy and moist after baking, and few people will like such bread, loaf or bun. At the same time, the dangers of yeast have been talked about for a long time, and even if these statements by experts can be questioned, we must not forget about the fermentation processes that this element causes. As a result, often when using yeast baked goods in large quantities gastrointestinal problems arise. And it doesn’t last as long as we would like. Because of such unpleasant moments, most housewives have already switched to yeast-free baking, and if previously these were buns and pies, today even bread dough can be kneaded without yeast. However, it still needs a certain leaven.
There are many sourdough options for bread dough, but the two most commonly used are any fermented milk product (kefir, fermented baked milk) or rye sourdough. The latter method takes 4 days, during which the starter will infuse before the dough is kneaded on it. Working with kefir is much faster, so bread is baked with it when it is needed. as soon as possible. As for taste, everything is individual. And from the point of view of its effect on digestion, rye sourdough will still act in almost the same way as yeast, promoting fermentation processes in the intestines. Therefore, homemade bread with kefir is the safest.
Compound:
- Kefir or sour milk- 200 ml
- Wheat flour - 220 g
- Oat or wheat bran - 70 g
- Olive oil - 2 tbsp. l.
- Soda - 2/3 tsp.
- Salt - a pinch
- Cumin - to taste
Preparation:
- Combine the flour with caraway seeds, salt and bran, add kefir little by little, while simultaneously mixing all the ingredients. The more carefully you act, the more homogeneous the mass will be. It is not recommended to beat such a dough, so it is important to prevent all possible lumps at the initial stage.
- The last thing to be added to the dough is olive oil and soda - it is better to add it when the oven is already preheated to 200 degrees. If you let the dough sit with soda already added to it for 10-15 minutes, the likelihood that the looseness and fluffiness will be lost increases. There is no need to extinguish the soda: kefir or sour milk will do this.
- At the specified temperature, the dough, poured into a cast-iron mold covered with foil, will remain in the oven for 30 minutes, after which the foil must be removed and the crust must be allowed to form. This may take another 10-15 minutes. The readiness of the baked goods is checked with a wooden stick inserted exactly into the middle: if it remains dry, the product can be removed. It is immediately removed from the mold and placed under a towel to rest.
- This recipe for homemade yeast-free bread in the oven is the simplest, but by no means the only one. Its main attraction is the speed of kneading the dough and baking the product itself. If desired, you can take rye bran and sprinkle the surface with pumpkin or sunflower seeds, or add seaweed to the dough, green onions and other ingredients. It is recommended to place the pan with bread in the oven on the lower level, so as not to provoke an excessively rapid formation of a crust when the middle is not baked.
Compound:
- Rye sourdough - 200 ml
- Warm water - 200 ml
- Sugar, salt - a pinch
- Rye flour - 500 g
Preparation:
- All ingredients are combined in a glass bowl and mixed with a wooden spoon or silicone spatula. The dough should be soft, sticking to the walls, but still holding its shape. If necessary, add a little more flour or oatmeal: this will only add zest to the bread.
- Cover the bowl with a towel and put it in a warm place for 5-6 hours, after which the dough must be kneaded and placed in a pre-prepared (oiled) form with thick walls. Or cover a baking sheet with parchment and place the bread on it, but then during the baking process it will take on the shape of a not too fluffy cake.
- You need to make several shallow cuts along the surface of the bread, sprinkle it with coriander seeds or caraway seeds, and then place the baking sheet in a cold oven. As soon as it heats up to 200 degrees (with convection - 180 degrees), the timer is set for 1.5 hours.
- After the specified time has passed, the loaf should be checked with a wooden stick: if it is dry, the oven turns off, but the bread remains in it for another 30-40 minutes. If it is wet, the product is first baked (10-15 minutes), then it is also finished in a hot oven that is turned off.
How to bake bread in the oven correctly?

If you are not baking traditional wheat bread, but want to enrich it with bran, be prepared for the fact that it will make the consistency a little heavier, as a result of which it will no longer be so airy and tender. To minimize this moment as much as possible, distribute bran and flour in a ratio of 1:3 - then you will be able to avoid excessive moisture in the finished bread.
Also, the power and functionality of the oven do not always allow bread to be baked evenly, even if it is under foil. Lowering the temperature won't do anything, raising it won't either. To get the same result as in a bread machine, but when using a low oven, professionals advise dividing a large amount of dough into 2-3 parts, depending on its quantity. Small bars are easier and faster to bake; due to their smaller height, they bake better. Also, it is advisable to take a ceramic or clay mold, not silicone or aluminum. And regardless of the material, it must have thick walls.
A lot depends on the flour you use for bread: it should be well sifted and fresh. The last nuance is easy to determine yourself: take a pinch and moisten it with warm water - if the flour does not darken, it is suitable for kneading dough.
The finished loaf is removed from the oven and placed on a wire rack (no wooden planks or silicone mats!) to give the bread airflow from below. Cover it with a towel on top and let it cool on its own. It is also recommended to store homemade yeast-free bread in a towel.
A person assigns a very important role to nutrition in life. Unique dishes with exotic ingredients are created, sometimes a rare combination of ingredients is involved in the preparation of an unusual dish. However, there is one dish that, although it has acquired a lot of varieties, is firmly entrenched in the human food line. We are talking about bread.
A variety of baked goods filled store shelves, private bakeries opened, and all kinds of baked goods, with bran and whole grains, yeast-free and puff pastry products beckon with their aroma. However, many people, due to certain knowledge and technology, increasingly strives to make baked goods on their own. Yeast-free bread is especially popular.
Yeast-free homemade bread: benefits and harms
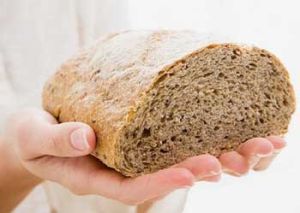
Like any food product, yeast-free bakery products have a number of advantages and disadvantages that you need to know everything about. And the topic “The benefits and harms of yeast-free bread” has remained popular for more than one generation. At the same time, the disadvantage and advantage of this dish is its structure. Due to its density and rigidity, it has an excellent effect on the gastrointestinal tract and promotes the functioning of the intestinal muscles. But at the same time, some people find this consistency unacceptable for consumption. Back to main positive point This can be attributed to the absence of yeast, and as a result there is no harm to the intestinal microflora. And also the main composition of the bread under discussion contains a lot of substances beneficial to human health. As for the shortcomings, the most significant are the size of the loaves and the specific taste. People are accustomed to lush and fragrant yeast bread, its counterpart without yeast has a dense structure and therefore will be almost half the size. In terms of taste yeast-free baking specific, but no less tasty than regular bread.
This product can be purchased ready-made from bakeries or bakeries, or you can prepare it yourself in several ways.
A simple bread machine recipe
Baking yeast-free bread in a bread machine is not a difficult or time-consuming task. The main thing is to stick to the recipe, and the machine will do everything itself.

To prepare yeast-free dough you will need:
- flour 2-2.5 cups;
- kefir 0.8-1.0 cups;
- salt, sugar and soda one teaspoon each.
What could be tastier than homemade yeast-free bread baked straight in the oven?
A soft, golden-crusted delicacy, each piece of which melts on the tongue.
This is a real celebration of taste! We will tell you how to prepare the most delicious yeast-free bread in the oven according to original recipes.

Benefits of yeast-free bread from the oven
Many of us don’t even think about what goes into the bread we buy in stores almost every day. But there is no more useful in it than in a stone.
In order to reduce production costs, factories producing baked goods actively use a variety of powders, flavor enhancers and chemicals.
It's easy to track this down.
How long can a purchased palyanitsa stand on the table before it becomes stale or moldy?
How does it taste if you try it the next day?
The answers will definitely not please us. Perhaps. that is why it is not a pity to throw away such bread or give it to feed the birds in the park.

But our ancestors, who always made bread with their own hands, treated every piece with care.
The reasons why we don't usually bother baking at home are simple. This requires time, effort, money.
But a freshly baked culinary masterpiece flies off the table in the blink of an eye, which is proof of its excellent taste.
In addition, by baking ourselves, we know exactly what ingredients are inside the product.
Accordingly, such bread is useful for any diet, even if you play sports and especially watch your diet.
Let's take a closer look at the pros and cons.
So, the positive properties of bread:
- The absence of yeast in the flour product guarantees excellent digestibility, which, in turn, greatly facilitates the digestion process
- Absence negative influence on the microflora of the stomach and intestines

What about the negative properties? There are none at all!
Homemade bread is healthy, nutritious and has excellent taste, so feel free to make it a rule to prepare it daily (or at least weekly).
How to make delicious yeast-free bread at home
Before you prepare a loaf of palyanitsa for yourself or your entire family, you should analyze the options yeast-free dough for bread in the oven.
There is no need to stop at the first recipe on the Internet.
Whey bread

One of them is whey bread without yeast in the oven. The serum can be either made by you or purchased.
A feature of this method is the need to infuse the main ingredient for 5 to 7 days.
Not very convenient, is it? But if you are not afraid of the deadlines, and you still decide to try, we bring to your attention the recipe.
Knead the dough from whey, two types of flour and bran.
Don't forget sugar, spices and salt to taste. If desired, you can use cumin, flax and coriander. Let it brew until the morning.
Preheat the oven, place the dough on a baking sheet or baking tray and bake for 45-60 minutes at 180°C. Wrap the finished loaf with foil and towels so that the bottom of the product does not remain raw.
Can be consumed after complete cooling.

This delicacy is prepared incredibly quickly.
You will need:
- Kefir
- Wheat flour
- Sugar
- Cumin, spices, nuts, dried fruits, etc.
Mix dry ingredients. Kefir is gradually poured into them, stirring. If you want to make the bread sweet, then instead of sugar you can add a few tablespoons of honey.
Knead the dough until it becomes soft and thick. From the resulting mass you need to form a loaf of arbitrary shape.
Bake for 25–30 minutes at 200°C.

Yeast-free rye bread baked in the oven is no less tasty. And his recipe is also based on sourdough.
This time you will need to do it yourself.
First day: take 50–100 grams of rye flour and pour water into it until it reaches the consistency of sour cream. The starter is covered and sent to a warm place until tomorrow.
On the second day, the procedure is repeated in exactly the same proportions.
On the third day, do the same and wait until bubbles appear on the surface of the mixture, indicating the start of fermentation.
When bubbles finally begin to form, the familiar procedure is repeated and the serum is left for a period of 4 to 12 hours.
Then knead the dough, adding flour, spices and various goodies to the starter: cumin, nuts, flax, wheat, bran, oats, etc. Bake for 40–60 minutes.
The temperature should be 200 °C.

Recipes for unleavened sourdough bread in the oven are, of course, much more complex in their technology than similar ones, but without the use of whey.
To change this a little, we offer you a little life hack.
When preparing homemade dough, set aside a small amount in the refrigerator.
Tip: don’t forget to feed the starter. If you don't use it once or twice a week, add a little flour and hot water. The dough should be removed from the refrigerator 6–10 hours before use.

Recipe for making whole grain bread without yeast:
- Cup of whole wheat flour
- 0.75 cups white flour
- 0.5 cups oatmeal
- 0.5 tablespoon of soda
- A glass of almond or regular milk
- Two teaspoons of lemon juice
- Salt, sunflower seeds, flax-seed optional
Before you start preparing the dough, turn on the oven at 200–205 °C.
We start cooking by mixing milk and lemon juice. Then you need to combine all the other ingredients and pour the resulting mixture into them.
Mix thoroughly and pour the resulting dough into the mold. 40 minutes and voila! The product is ready for use.
This bread is very useful as a snack between sports training.

A recipe for yeast-free rye bread in the oven may not include sourdough.
For it you need to take 300 grams of peeled rye flour, 200 grams of wheat flour, salt, sugar, butter and water.
Tip: You can use honey instead of sugar.
All ingredients must be mixed using a mixer and covered with a lid or cling film, set aside in a warm place for 24 hours.
Then pour the finished mixture onto a baking sheet or into a mold and place in the oven for one hour. The temperature should not exceed 30 °C.
After this time, we change temperature regime at 150 °C and set aside for another hour.
Remove the finished bread from the oven and reserve.
The palyanitsa should steep for another 60–70 minutes, during which time all excess moisture will come out of the loaf.

Enough simple recipe Unleavened bread in the oven is rightfully considered kefir.
We have already discussed one of the options above, but now we will talk about a test with a “surprise”.
To prepare it, heat a glass of kefir to room temperature and pour it into a container along with half a teaspoon of soda.
To a glass of wheat flour and one glass of rye flour add salt, sugar and a “surprise”, which is dried dill, parsley, basil, garlic and other spices you like.
Pour the mixed dry ingredients into the liquid and knead the dough. It should infuse for about ten minutes.
After which the dough is sent to the oven for 30–45 minutes. Then, if desired, the product can be sprinkled with grated cheese and left for a few more minutes.
This type of bread perfectly complements pumpkin or zucchini dishes.

A recipe for yeast-free bread in the oven can be not only salty, but also sweet.
The best, or rather, most delicious example of an excellent vegetarian recipe is banana palyanitsa.
It requires overripe bananas, butter, flour, sugar and baking powder. Mash the bananas to a puree consistency, then combine them with melted butter.
Knead everything until smooth, add the remaining ingredients and, placing it in a mold, put it in the oven for an hour.
Bonus: bread in a slow cooker

You can bake yeast-free bread at home not only in the oven, but also according to a recipe for a slow cooker. To prepare it, mix melted butter with kefir.
Mix two types of flour with flakes and spices and combine with liquid. Form the dough into a ball, which we place on the bottom of the multicooker bowl.
Then turn on the “Baking” mode for 30 minutes.
After the beep, turn the loaf over and continue cooking for another 30 minutes.

We talked about just a few options for making homemade bread. By experimenting, you can achieve dizzying results that will surprise everyone.
You certainly don’t want to give preference to products with an unknown composition; you’ll forget about store-bought baked goods.
Who knows, perhaps the recipe you came up with for this particular dish will be kept in your family for centuries and will become the beginning new tradition in family cooking.
And all that remains for us is to wish you a bon appetit, and, of course, take care of your figure.
And, most importantly, do not forget to add secret ingredient, capable of making any dish unforgettable - love!