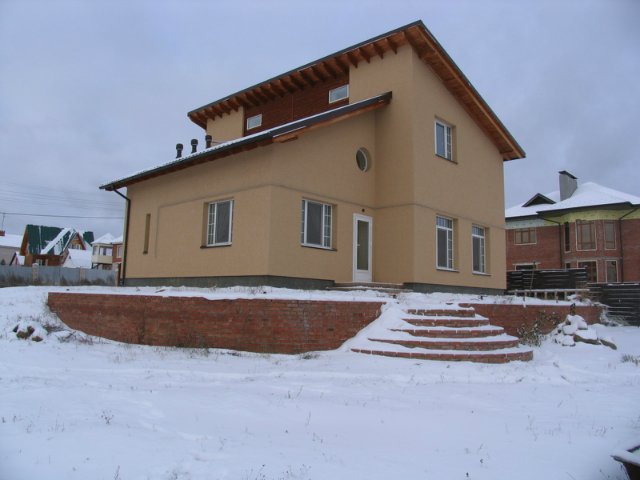
Today, more and more people prefer to settle in their own home, where they can create full comfort and coziness for the whole family. It is even better when this house is created according to its own design and with its own hands. However, in this case, it is necessary to know every nuance from the laying of the foundation to the construction of the roof. This view a gable roof allows you to create additional residential square meters for arranging a living room, bedroom, study or other room. In this article, we will consider the device of a gable roof attic, and the step-by-step process of its construction.
general information
Remember. All instructions are for informational purposes only. For the construction of a roof, we advise you to use the services and advice of specialists, because each case is specific.
Before you start building a house, you need to make the entire project and drawing of the roof with ready-made dimensions, roof height, number of slopes, etc. In this example, we will consider the construction of a classic gable roof attic, which is the most popular in our time.
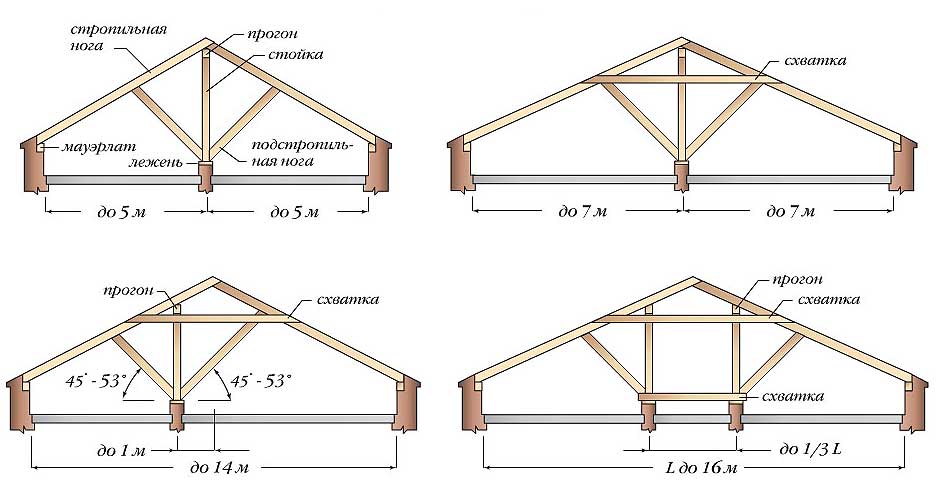
Today you can meet different types gable mansard roofs.
A) and B) classic gable roofs;
B) a broken roof with a variable inclined angle;
G) pitched roof with outboard consoles;
E) a two-tiered roof with offset support spikes.
However, you can develop your own project, which would suit your parameters and requests as much as possible.
Attention! Before starting work, you can calculate the approximate cost of work and the amount of materials for the construction of the roof. To do this, we have specially developed online applications on our website:
Mauerlat installation
The bars of the Mauerlat serve as a reliable support for the future truss structure, which will securely fix the entire frame.
Mauerlat must be used where the rafters are tilted. If the roof is of a gable type, then we install the Mauerlat on both sides, if the roof is hipped, then along the perimeter of the entire roof.
It is most correct to use a monolithic pouring of concrete with pins of the required length and thickness of 1 cm for fastening the Mauerlat. In order for the pins to securely fix the Mauerlat beams, they must protrude 3 cm above the concrete.
Important! Mauerlat beams must be selected based on the load of the entire roof. In our case, we use a 10x10 cm section, but 15x15 cm and 20x20 cm are also available.
To determine the step between the pins, it is necessary to calculate where the joints of the rafters and the Mauerlat will be located so that there are pins between these joints. If the stud rests against the rafter or its cutout, this will not only weaken the structure, but can also lead to cracks on the board. For example, if the step between the rafters is 1 meter, then we also use a step of 1 m between the studs, only in the center between the two rafters.
A double layer of waterproofing (roofing felt) must be laid on the studs before installing the Mauerlat. We drill on each beam under the studs through holes opposite each hairpin. We use nuts and washers to fix the stud and Mauerlat.
Advice! TO brick walls the bars of the Mauerlat can be fixed to the studs that are inserted into the masonry at the stage of building the box.
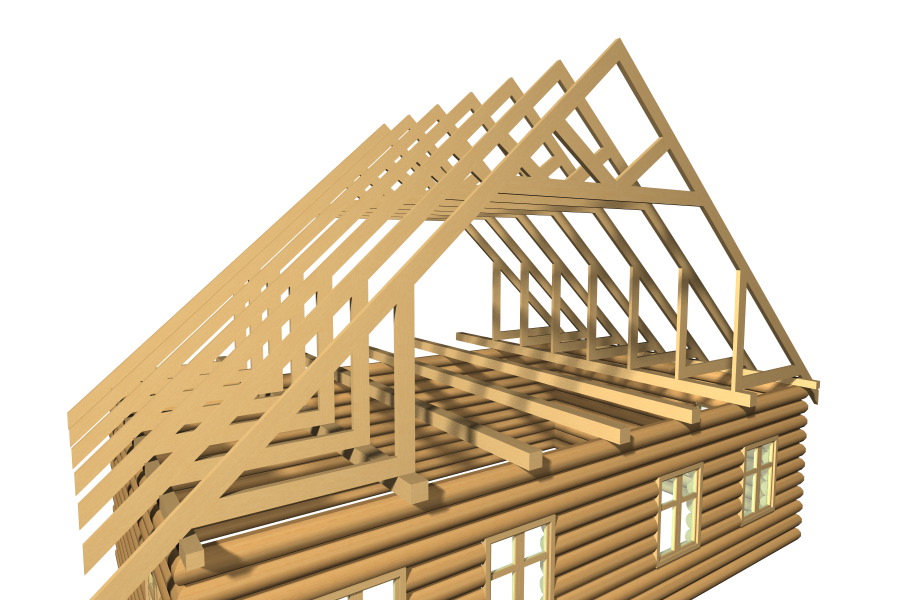
Diy gable roof rafter system
Before proceeding with the installation of the rafters, we need to make a template for all the rafter trusses.
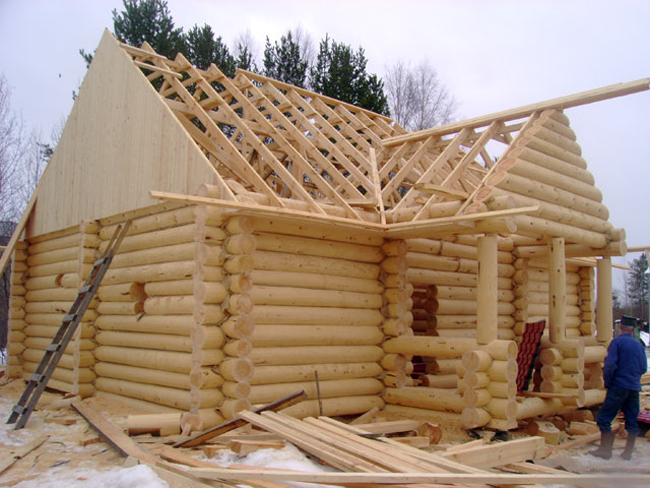
To do this, we climb out to the top of the house, where we connect the boards at the desired angle and fix them with a crossbar and mark for future cutouts near the wall and Mauerlat. After that, on the ground, we begin the assembly of the trusses, followed by their lifting and installation on the roof.
First of all, we begin the installation of the extreme rafters 4 meters long (3.5 meters from the stop to the ridge and 0.5 meters will go to the ramp), which should be at the same level and strictly symmetrical if the roof is gable as in our example. At the time of installation of the two extreme rafters, they must be strengthened for reliability with two braces as in the photo below and a corner below. We use a plumb line for the horizontal position of the first extreme rafters. We pull a thread between them, along which we will install other rafters in level.
Next, we proceed to the installation of special racks that will transfer the weight to the walls through the rafter structure. For fixing, metal corners were used, which we fix with wood screws, 6 on each side of the stop.
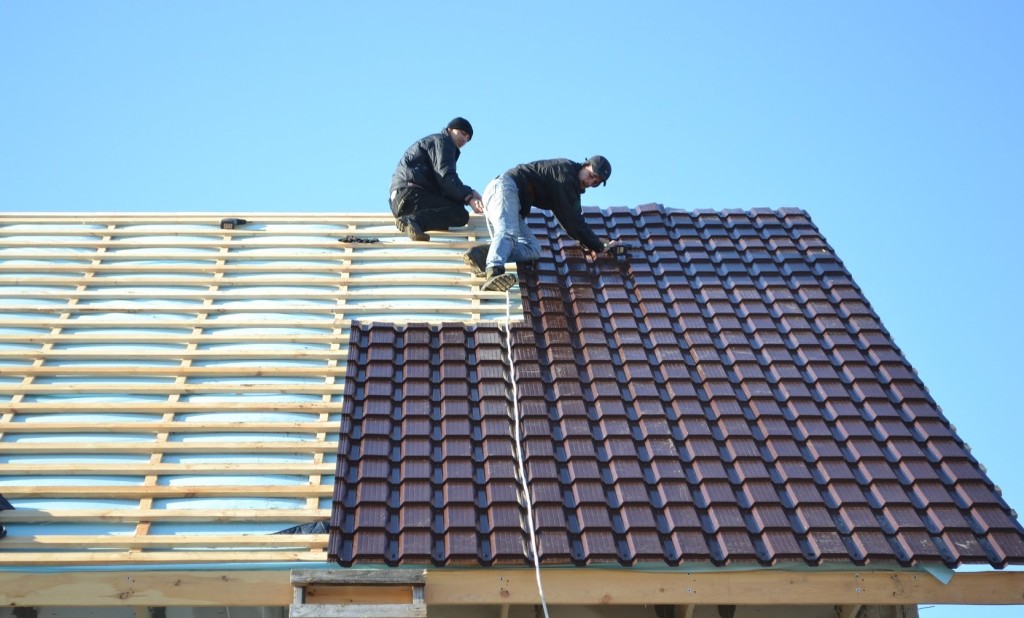
Construction of a gable roof attic video with a step-by-step photo report
Now we begin to assemble the rafter structure throughout the frame. After installing the rafter leg, we fix it on the other side with a second stand. To increase the strength at the bottom, between the two posts, we install a wooden wedge, as shown in the photo below. For fixing, it is best to use long wood screws or metal studs with a diameter of 12 mm.
On the outer rafters, we install 2 crossbars for the rigidity of the structure, fix them with metal plates and wood screws.
At the top of the triangle, we install a boss, between it and the crossbar, an upper beam will be installed, on which the entire roof truss structure will be installed. The upper beam serves as a load-bearing function for the rigidity of the entire frame.
If the length of the roof exceeds the length of the beam, then to lengthen it, you can use a retainer from two pieces of edged boards 40-50 cm long, which are fixed with metal studs.
On the extreme rafters, we install a second support for the rigidity of the structure, which we fix from below with a metal corner, and from above to the rafter with wood screws.
We install two crossbars from each rafter board along the perimeter of the frame; we use metal studs for fixing.
In the upper part, to fix the connection of the rafters, we use an iron corner and metal studs. This stage is very important for the future rigidity and reliability of the building structure. At the joints of the rafters, if they fall on the supporting beam, then it is necessary to carefully cut each rafter board with a hacksaw and make a recess.
The roof slope behind the wall should be at a distance of at least 50-60 cm so that snow does not blow in there, and slanting rain does not fall.
Finished rafter structure.
Insulation of a gable roof attic and waterproofing
To have in the attic comfortable conditions for living, it must be insulated. Today, for insulation, you can use various materials, foam, mineral wool etc. Also important is waterproofing, which excludes the collection of condensate, as well as the ingress of moisture into the room in case of roof leaks.
To fix the waterproofing, you can use special brackets or nails, which are fixed to the rafter structure with a pitch of 10-15 cm from the outside and then fastened with counter-lattice bars.
Important! The presence of a gap between the roof and the counter-lattice is necessary to exclude the formation of condensation and reduce the heat-shielding properties of the roof.
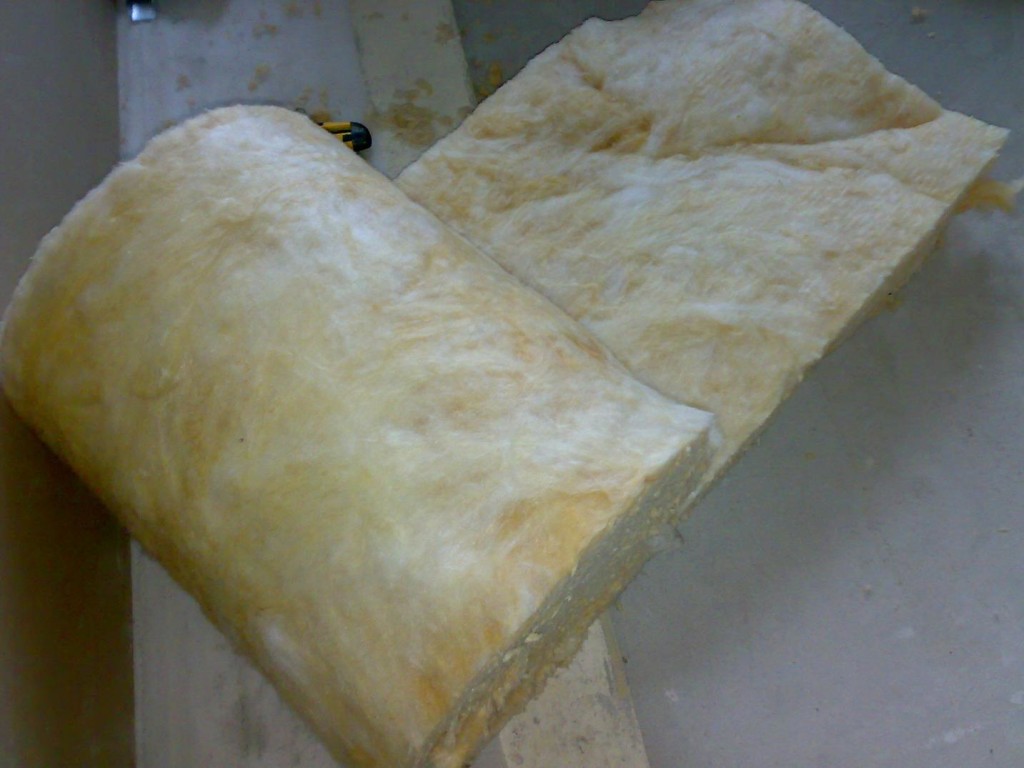
We turn to thermal insulation using special mineral wool from URSA with a thickness of 15 cm.The width of the roll is 60 cm, in this case if the rafter spans are narrower than this distance, then it will be necessary to cut the sheets across the right size... Roof insulation is an important and responsible process.
This material allows you to fill the entire space without joints, eliminating heat leakage.
Quite often, people decide to expand the usable area of their homes by creating an attic. Traditionally m Ansarda is a living room arranged directly under the roof... That is, it is a kind of ennobled attic in which you can live as comfortably as in any other room of the house.
The arrangement of the attic has many stages and important nuances. One of the most important parts of this work is the construction of a mansard-type roof, which can be erected without any problems with your own hands.
The construction of a mansard-type roof with your own hands should begin with the preparation of the necessary design documentation and the calculation of the configuration of the structure. One of the most important points, with which it is necessary to decide first of all, is the slope of the rays. The useful area of the attic room directly depends on this parameter.
The walls of the attic can be completely vertical or have some slope. As many years of practice show, the most the best option a mansard-type roof is a gable system, each slope of which has a break, passing approximately in the middle... The space under such a roof turns out to be as spacious and comfortable as possible for living.
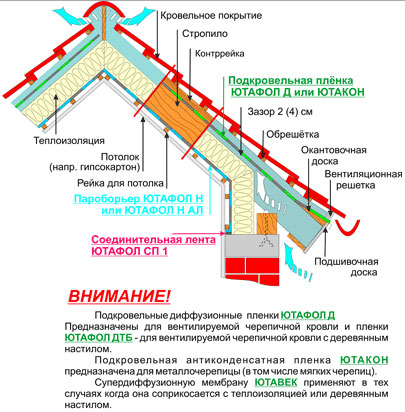
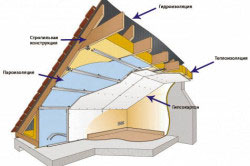
If you look at the attic roofing system in section, you can see a kind of "pie", the layers of which are represented by finishing material, lathing, moisture insulation, rafter system, ventilation gaps, insulation, ceiling slats, vapor barrier material and some kind of finishing.
For the manufacture of the attic frame, consisting of appropriately assembled battens and rafters, natural wood is used. The preference is given to pine. It is important that the material is of the highest quality. Any kind of defects and damage will negatively affect the life of the roofing structure as a whole.
Almost any material is suitable for the finishing roof of a mansard roof. Here, the most attention should be paid to the personal preferences of the owner and his budget. Study the basic properties of each available material and choose the most suitable one.
For example, metal shingles have the most modest level of sound insulation and the worst values of thermal conductivity, so if this particular material is used, special attention must be paid to the selection and installation of thermal insulation.
Usually, dense mineral wool is used to insulate mansard roofs. Insulation is laid in a layer of at least 20 cm. A simple plastic wrap is also suitable for protection against moisture. The main thing is that its thickness is more than 0.5 mm. With regard to vapor barrier, in the case of mansard roofs, it is best to use a perforated film.
The main stages of the mansard roof device
The work begins with calculating the roof of the attic type and drawing up a detailed project indicating all the significant points. If the attic will be built in a new house, the construction of which has not yet been completed, all the required calculations, as a rule, are indicated in the project documentation for the house.
If a finished building is being reconstructed, you first need to draw up a project. In the absence of the proper skills, it is better to entrust this work to professionals, becausemistakes at the design stage can lead to a significant deterioration in the quality, reliability and durability of the entire structure as a whole.
The foundation of the building and the load-bearing walls must be checked for any kind of damage. Next, you need to get rid of the old roofing system and install new rafters in accordance with the prepared project. After fixing all the provided rafters, insulation and moisture insulation for ceilings and new structures are laid. Then the end walls and new roof slab must be installed with the desired configuration.
It is very important to choose the materials that are best suited for arranging a mansard roof. At the same time, the material should not be very heavy and as reliable as possible. In practice, wood has proven itself best.
The device of the rafter system

In the process of building a mansard-type roof, special attention should be paid to the stage of erecting the rafter system. This work is carried out in several stages. First, the Mauerlat is mounted, after the rafter structure is fixed, then additional fasteners are installed, and at the end, the construction of the lathing is carried out.
In the case of a mansard roof, the Mauerlat should be installed where the slope of the rafters is noted. If it is a gable roof, the element in question is fixed on both sides. If the roof structure consists of 4 slopes, the main beams must be placed along the perimeter.

Most often, the bars are attached to the wall by creating a concrete pour using special pins, due to which they are docked with pre-prepared holes in the Mauerlat bars. Galvanized studs from 10 cm in diameter are best suited for this task. Select the length so that the fasteners protrude beyond the boundary of the concrete pouring by at least 30 mm.
When choosing the cross-section of the beams for mounting the Mauerlat, be guided by the expected loads. The most popular option is a bar with a section of 150x150 mm. In rare cases, a material with a section of 200x200 mm is used.
Fasten the studs at such a distance from each other that they are not at the joints of the rafter bars, otherwise there will be too many cuts per structural element, which will simply weaken it. For example, if the rafters are installed at a distance of 100 cm from each other, the studs can be installed at the same distance, only so that they are between the rafters.

Before installing the Mauerlat, it is strongly recommended to perform waterproofing work. Most often, roofing material is used to ensure moisture protection. If you wish, you can choose other materials with similar characteristics. In the bars of the Mauerlat, holes must be prepared the same size as the size of the studs. After the bars are installed, washers must be installed on the studs and the entire system must be securely fixed with nuts.
Mauerlat bars are best fixed with galvanized pins. If work is carried out in a brick building, it is recommended to mount the fastening pins in a brick insert even at the stage of wall construction.
Start securing the trusses. It is better to prepare in advance a template that can be used during the assembly process. Climb to the roof and hold wooden blocks at the desired angle, prepare the required mountings and mark the locations for the mounting cutouts. Then you will be able to work on the ground using the prepared sample to assemble all the truss trusses. When everything is complete, you simply lift the finished structures up and secure each of them in their place.
This work begins with anchoring the extreme farms. A level is stretched along the ridge to control the correct installation of all other trusses. The rafters are fastened to the Mauerlat with brackets or metal studs. The rafters are fastened to each other with brackets or brackets.
After completing the installation of all trusses, proceed to the placement of additional jumpers and the preparation of the screeds necessary to increase the rigidity of the roof structure. Traditionally, when arranging an attic roof, a crossbar is mounted near the upper junction of the rafters, designed to fix the rafters. Additionally, it will serve as the attic ceiling.
If the erected roof of the type in question will have windows or a balcony, leave the openings of the required size in the rafter system. If it is planned to install window structures with a take-out and vertical placement, it will be necessary to prepare separate rafter systems for them.
Finishing stages of construction
After completing the installation of all trusses, you will need to cover the inside of the roof structure with vapor barrier material. It will protect the insulation from contact with moisture coming from the inside of the room.
Proceed with roof insulation. Most often, mineral wool is used to solve this problem. It is enough just to lay the insulation plates in the space between the rafters, and then close them with waterproofing material. Polyethylene is usually used for moisture insulation.
Proceed with the lathing device. When choosing the method of mounting the battens, take into account the characteristics of the selected finishing material. For example, it is better to lay a rolled roof on a solid lathing, but tiles and slate require a sparse lathing. Install all roofing material. On this, the main part of the work can be considered finished.
It often happens that the strength of the overlap between floors is not high enough. The overlap should normally withstand the load created by furniture, appliances and other interior elements, as well as by people inside the room. Floor attic floor should be as strong and even as possible.
In cases where the under-roof floors are not used for living, the floor beams are laid in increments of 80 cm. If it is planned to arrange a full-fledged attic floor, such a distance between the boards is unacceptable. The overlap must be additionally reinforced. However, the possibility of arranging additional floors is far from always.
You can get by at lower costs by disassembling the attic floor and securing additional joists across the subfloor boards, and then returning the finishing flooring back to its place. The stiffness of the overlap obtained in this way is in most cases quite sufficient.
It is recommended to think over the arrangement of the attic floor even before the roof construction is completed. The features of the organization of living space can make their own adjustments to the process of building an attic roof with their own hands.
First, you need to choose a place to place the stairs to the under-roof floor. The most important thing is that it does not interfere with normal life on the floor below.

Particular attention should be paid to the thermal insulation of the roof and the attic room as a whole. Temperature changes in the attic are significantly more pronounced than in any other place in a private house. Thermal insulation should be of the highest quality and density. The thickness of the layer is selected taking into account the weather conditions in the region.
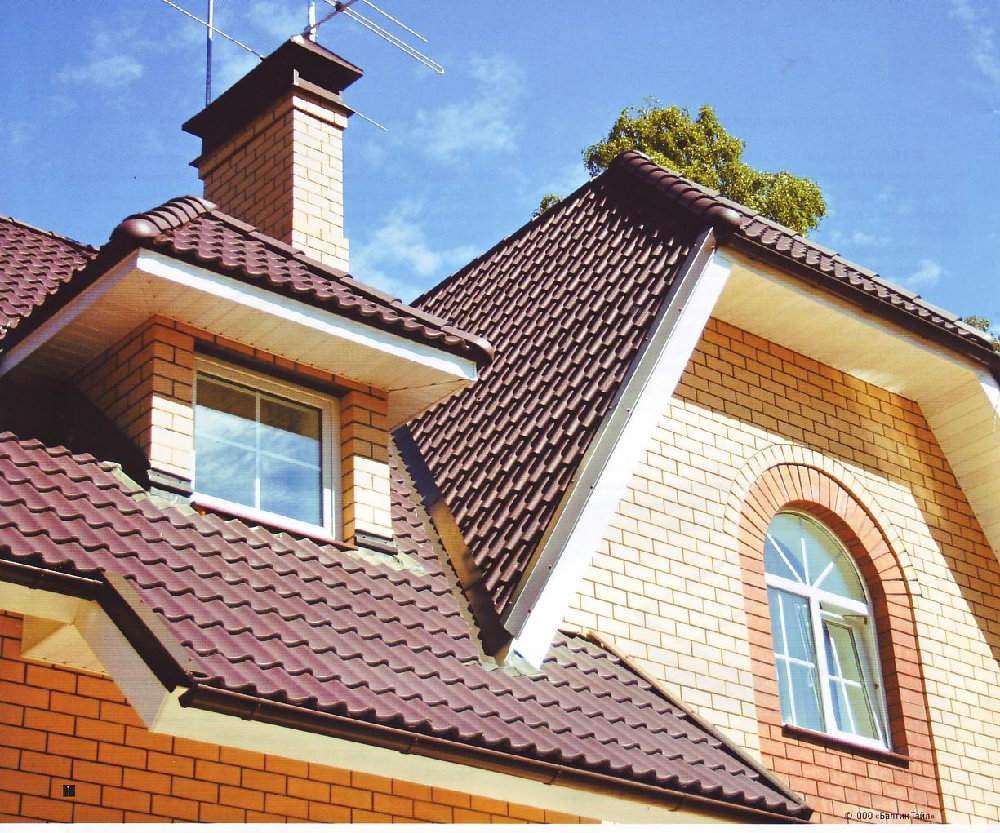
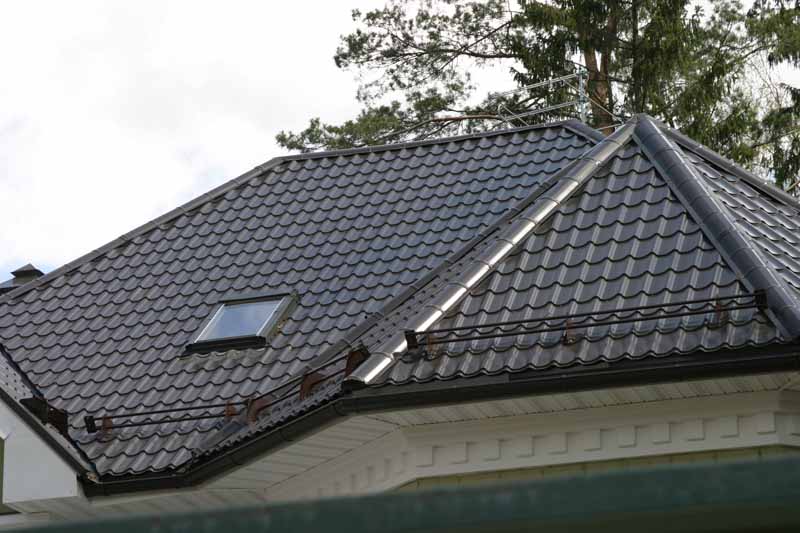
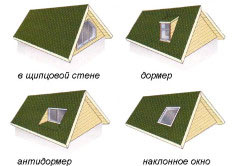
It is recommended to install windows in gables. Their installation in the planes of the slopes is much more laborious and expensive. Vertical windows installed in special "birdhouses". In the inclined parts of the structure, you can mount the so-called. roof windows. This is a much more preferable option when compared to the vertical counterpart. They are sold immediately ready for installation with all the required accessories.

In the absence of the appropriate skills, it is better to entrust the installation of roof windows to experienced professionals, because any mistakes at this stage lead to a breach of the tightness and the appearance of many related problems in the form of condensation, drafts, mold, etc.
To decorate the attic room, you can use any familiar materials. Difficulties arise except when finishing with tiles: it is rather difficult to glue it on inclined surfaces. Plus, the tile has a relatively heavy weight, which is absolutely undesirable for the attic.
Select furniture at your discretion. You just need to try to think over everything so that the furniture does not interfere with a comfortable stay and life inside the attic, because sloped walls in combination with a non-standard ceiling are already making their contribution.
Thus, it is quite possible to build a mansard-type roof with your own hands. However, the successful achievement of the set goals is possible only under the condition of competent preparation for work and maintaining attentiveness and vigilance at every stage of its implementation.
Video - How to build a mansard-type roof
The attic floor is a more spacious and well-prepared attic for life. The features of the premises dictate their own conditions in relation to the roof. Arrangement of a mansard roof does not require any special knowledge and skills from the contractor. It is enough to prepare necessary tools, read the instructions in detail and follow its recommendations in everything.
There are several types of mansard roofs. Check out the features of each of these roofs and choose the one that suits you best. The main points of construction technology are common to all types of construction.
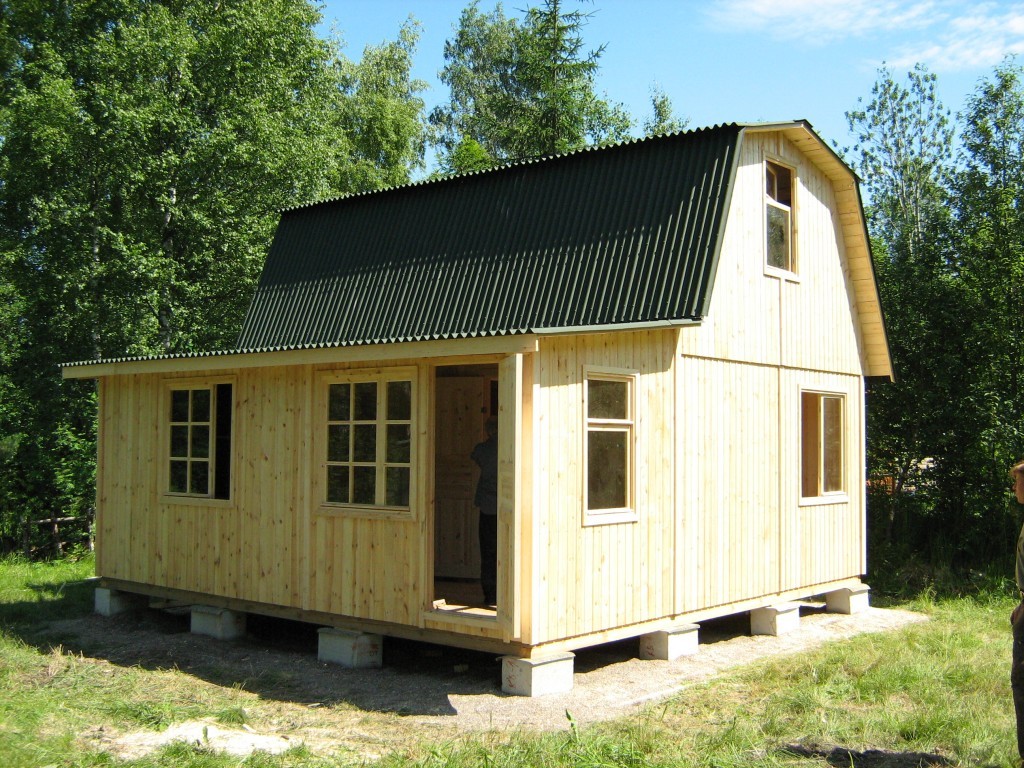
The simplest option is a shed roof attic. This design is performed with some bias. It is used quite rarely, because due to the slope, the usable area of the attic room decreases.
The most popular option is a gable roof attic. It will be comfortable and spacious inside the roof space. The gable roof is simple and profitable in arrangement.
It is a kind of gable structure. In this case, the slopes will not be even, but broken. Usually sloping roofs used in cases with small houses.
Hip roof consists of four stingrays. The rafter system of the hip roof is somewhat complicated.
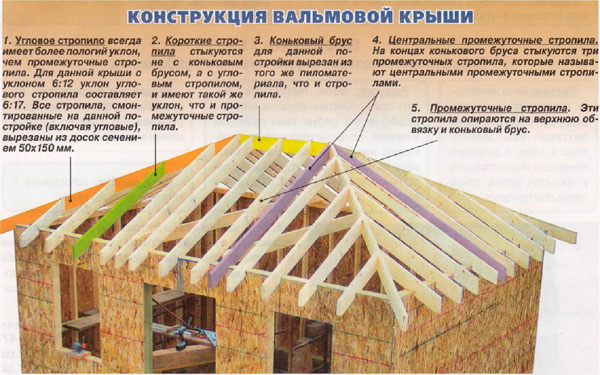
Half hip roof is a kind of hipped roof. In this case, under a half-hip it is customary to mean that slope that, as it were, cuts off part of the end side of the gable roof. The slice can go from below and form a trapezoid, or above and create a triangle.
Interesting varieties of hipped roof attic are pyramidal and conical roofs... These structures look best on polygonal houses and buildings. round shape... Perfectly combined with other types of roofs.

They are used quite rarely. This design has a smooth parabolic or circular shape. Previously, such roofs were widely used in the arrangement of rectangular houses.

What does the attic roof structure consist of?
Roof roof in section, it represents a “pie” consisting of several layers.

- Finish coating. There are many materials available on the market today with a wide variety of characteristics. Tiles are traditionally the most popular. From budget options, we can recommend ondulin and slate.
- Roofing film. This material provides reliable protection of the thermal insulation layer from adverse influences. different materials, a suitable under-roofing film must also be selected on an individual basis.
- Waterproofing layer. Ordinary plastic film is most often used as moisture insulation.
- Lathing and rafter system. This is the frame of the attic roof. Most often, rafters and lathing are made from wooden blocks. The rafters contribute to the even distribution of the loads coming from the roof to the walls of the building.
- Thermal insulation. Without high-quality insulation in the attic, it will simply be impossible to live comfortably in the cold season. A large selection of various heaters is available for sale. The most popular thermal insulator is mineral wool, which is an inexpensive material with excellent performance and performance.
- Vapor barrier layer. The vapor barrier will prevent the formation of condensation, which will ensure additional protection the main elements of the system and will contribute to an increase in the service life of the roof as a whole.
Mansard Roof Calculation Guide

The mansard roof is calculated according to an extremely simple scheme. It is important to take into account not only the useful, but also the deaf area of the attic space. In this case, a zone in which the distance between the ceiling and the floor is more than 90-100 cm will be considered useful. The rest of the places are traditionally considered a dead zone. It is impossible to live in such areas, but in their place you can install various shelves and other household accessories.
Calculate the total roof area. At this stage, the roof plan will come in handy. Break the space into several simple figures, calculate the area of each of them, and then sum the obtained values to determine the total area of the roof.
Before you start building a mansard roof, pay attention to the row important little things which include features of the thermal insulation of the structure, the order of placement of window openings etc.
Deserves special attention permissible angle of inclination of the roof slope.If the slope exceeds the permissible value, the area of the attic will be significantly reduced. This moment is individual and is selected taking into account the area of the attic and other important parameters.

Select the appropriate type of rafter system. Rafters, as noted, contribute to an even distribution of the load on the walls. Additionally thanks to rafter system reliable protection of the house from all kinds of adverse weather conditions is provided.
The simplest version of a mansard roof is a triangular structure. The most difficult thing is to make a mansard roof with a kink. In the absence of the appropriate skills, it is strongly discouraged to undertake the independent arrangement of complex roofs.
Step-by-step instructions for building a mansard roof
There are no super complicated stages in the construction of a mansard roof. You just need to carefully read the instructions and step by step follow all the recommendations.
First step. Calculate the strength of the building. The attic increases the load on the walls and foundations of the house. It is better if qualified specialists are involved in the calculation. If you do not plan to carry out work to strengthen the house, you can skip this stage.
Second step. Calculate the attic and prepare a project for the future attic and roof. It is also recommended to involve specialists in this work. If you wish, you can try to compose the project yourself or use some ready-made solution from available sources.
Third step. Do this as carefully as possible, try not to damage other structural elements of the house.

Fourth step. Make a rafter frame. This is the most time-consuming stage of the instruction in question. It is better if at least 3 people are involved in arranging the frame at the same time.
Fifth step. Place and secure the Mauerlat. To assemble this element, use wooden blocks 10x10 cm in size.
Sixth step. Install the frame for the roof space. The frame elements will simultaneously function as supports for the rafters. Attach the vertical posts at the edges of the building first. The uprights must be attached to long beams. Self-tapping screws and ordinary metal corners will help you with this.
Seventh step. Attach a jumper to the posts.
Eighth step. Make sure that the above items are installed correctly. Any cord will help you with this - just pull it between the arches formed. If the cord is in a strictly horizontal position, you did everything right. If the cord deviates from the horizontal, trim the inappropriate arches or replace them altogether with new elements.
Ninth step. Lock the arches together. Nail plates or stamping corners will help you with this.

Attach the first rafters where the roof slope will have a maximum slope. To obtain the required slope, you simply cut the bars to the required length.
The first step is to prepare the rafters. Cut the bars to the desired length and angle in advance. At the bottom of the rafter legs, select the grooves for connecting to the Mauerlat. The grooves can be made with a chisel.
Second step. Fasten each piece to its designated spot.
Third step. Go to the installation of the upper rafters. Be especially careful at this stage. Observe the desired slope angle and, in general, the alignment of the structure.
Fourth step. The crate can be made from plywood sheets or ordinary wooden planks... The type of battens should be suitable for the selected roofing material, usually a continuous deck. This is the most versatile and most reliable option.
Laying protective materials and finishing work
Mansard roofing requires the organization of high-quality protection from various adverse factors.
The first step is to install the vapor barrier material. The vapor barrier must be secured with inside rafter system. The material is attached to the bars with special construction brackets.
The second step is laying the insulation. Mineral wool is traditionally used for insulation. If you wish, you can opt for a more modern and expensive material. Insulation plates should fit tightly together and fit just as tightly to the rafters.
The third step is the lathing device. On the laid insulation, you need to fill the crate. Use regular wooden blocks. Fasten the elements of the crate with a step of about half a meter. Thanks to this system, the insulation will remain in place.

The fourth step is to install the moisture-proofing material. Attach the waterproofing to the outside of the rafter system. Polyethylene film is most often used as a moisture protective layer. Waterproofing will protect the elements of the roof from atmospheric moisture.
The fifth step is laying the topcoat. Choose the roofing material at your discretion. The best option in terms of the ratio of cost and quality characteristics is metal. From budget materials you can recommend slate or its more modern analogue ondulin.
After you fix the selected roofing material, the construction of the attic roof can be considered complete. Thus, there is nothing difficult in arranging the considered system with your own hands. Understand the instructions, and you will successfully cope with all the tasks without outside help.
Video - Do-it-yourself mansard roof step by step
The attic is one of the most amazing architectural elements that was created not so long ago. The authorship of this idea belongs to François Mansard, after whom this space under the very roof of the house was named. Today, the question of how to do it is very relevant among developers of low-rise, private construction. This interest is due to the fact that the attic is a space under the roof itself, which has a sloped ceiling, but is adapted for a comfortable stay in it.
Today attics are not easy easy way expand the living space of the house, but also the ability to decorate the building. can be made in any style, they will be complemented by graceful balconies, unusual windows cut right in the ceiling, architectural decorative elements... Attic structures can be used as living quarters. The second floor is suitable for a nursery, study or playroom.
Advantages and disadvantages of mansard roofs
Mansard structures are distinguished by the fact that they can be constructed from the most various materials, for example, made of wood, metal, reinforced concrete. There are no restrictions here, it is only necessary to ensure stability and proper insulation. Indoor ceilings can also be very different: inclined, flat with one inclined wall, formed by two slopes converging under acute angle... All this and much more has contributed to the popularity of the attic for more than four hundred years.
The main advantages of such a roof are as follows:

- The possibility of adding an attic, that is, using the infrastructure of an already standing building. At the same time, there is no need to completely disassemble the entire roof, which allows significant savings during work. This is an additional floor that can be used for its intended purpose.
- The living area of the house is increased due to the reconstruction of an unused attic space. This allows you to add a full-fledged second floor at a relatively low cost.
- In places with rather dense buildings, the attic second floor is the best way out.
- The external appearance of the building is improving, the building acquires a complete, holistic look.
- Attics can be built on not only one level. If necessary and observing all the rules and requirements, it is possible to build a two-tier attic, which will decorate any building, adding additional living space to it.
- When constructing an attic, heat loss through the roof of the house is greatly reduced. It also translates into lower heating costs during the winter months.
- perhaps even in a residential building without the need to resettle the tenants. For this, it is not necessary to use heavy construction equipment, all work is carried out directly on the roof of the building for shortest time... A new floor can be erected with virtually no problems and costs.
But when constructing an attic, there are also disadvantages, like any design. It is worth noting such disadvantages as:
- When arranging such a room, some of the usable area is lost.
- Sloped and sloped ceilings greatly reduce the height of the walls, the ceilings in the attic are usually low, not exceeding 2.4 meters.
- In many cases, windows can be located only in the ceiling, which is not always convenient.
- due to lack of ventilation, they begin to degrade quickly. Typically, their service life is about three times less than when installing a cold attic.
- On roof windows In winter, large masses of snow often accumulate, which reduces the level of already insufficient lighting.
Varieties of designs
When deciding how to make an attic, you must first decide what type of rafter system will be used. A characteristic feature of the attic structure is its broken, rather steep configurations, but we must not forget that this is not an aesthetic function, but a purely practical one. Such broken shapes provide:
- correct transfer of all loads to the bearing walls;
- allow you to effectively protect the entire structure from precipitation;
- give stability to such negative phenomena as temperature drops, showers, snowfall, the formation of a large amount of ice.
The most simple form residential attic - this is a triangle, the most difficult - with a break. All horizontal logs and vertical posts are recommended to be made of thin wooden beams.
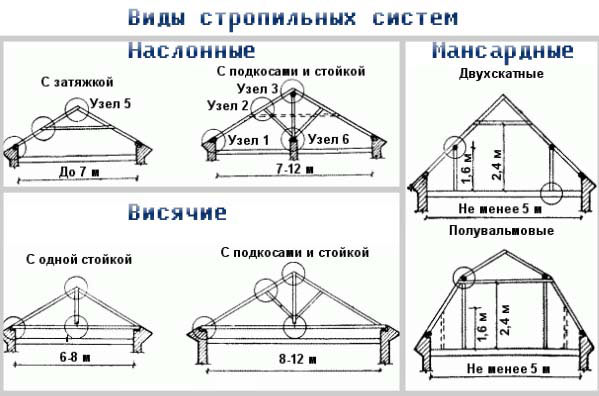
Among the truss systems used for the attic floor, the most commonly used are:
- Hanging rafters. They rest on the walls creating a horizontal load. If you decide to make an attic second floor using this type of rafter system, then you need to take into account the design features. To connect the beams, intermediate supports are not used here, only special puffs made of metal or wood.
- The inclined type of rafter system is recommended for small cottages in which the load-bearing wall is located in the center or intermediate supports are available. The rafters rest on the outer walls, the middle part of the structure on inner wall... Apply such simple system is possible only for those houses in which the distance between free-standing bearing walls is no more than six and a half meters.
- Hanging and inclined rafters can be in the form right triangles which have emphasis behind load-bearing wall... In this case, the Mauerlat does not need to be erected, ordinary beams are taken for the rafters. The struts are required, all the racks cut into the floor beams, the rafters are fastened with anchors.
Construction stages
So how to properly assemble the attic structure? The sequence of all work should be strictly observed, which will allow you to build a solid, reliable attic. It is imperative to correctly identify all loads, which can only be done by experienced designers.
The construction of the attic provides for such work as:
- ... In this case, it is not required to completely disassemble the overlap. Unless it is provided for by the project.
- If necessary, the floor structures are strengthened. This is done so that the second floor (attic) does not give unnecessary stress. If necessary, an additional layer of waterproofing is laid at this stage.
- The construction of the rafter system,.
- Installation of windows.
- Internal and external finishing of the building.
For the construction of the attic, it is recommended to use wooden beams, which have a cross section of fifty to one hundred and fifty centimeters. At the same time, the following sequence of work is observed: first, the frame of the future structure is made, after which the supporting ones are strengthened. After the installation of stepped bevels, waterproofing work, insulation is laid. Now you can reinforce the battens and install the roofing material. Finishing work are carried out last after all windows have been installed.
How to insulate the attic correctly?
The attic second floor must be insulated without fail in order to ensure the safety of the structure and the comfort of living conditions. For such a process to become effective, it is necessary to observe the construction of a multi-layer "pie", which includes:
- internal finishing material on the ceiling of the attic room: moisture-resistant plywood, drywall, etc.
- vapor barrier membrane;
- insulation (usually mineral wool in rolls or slabs);
- laying waterproofing;
- installation of roofing (tiles, corrugated board, etc.).
The layer of insulation should be two hundred and fifty to three hundred millimeters, often a special frame is made for laying it, attached perpendicular to the rafter system. When laying, it should not be allowed that gaps and cavities remain between the insulation plates, as this will lead to significant heat losses, low thermal insulation efficiency.
The attic is not only beautiful, but also a very functional architectural element that is able to fulfill the numerous tasks assigned to it. This is a great place to live. Here you can equip a nursery, a playroom or a large gym.