Text editor Word from the office package Microsoft programs Office allows you to create documents of any complexity with almost any possible types formatting that users may require. With it you can create very complex tables, use insert mathematical formulas, add hypertext links, pictures, schematic diagrams, various special characters and perform many other useful actions to documents.
One of the popular document design features is the ability to write vertically. You can do this in three in various ways. Let's take a closer look at them.
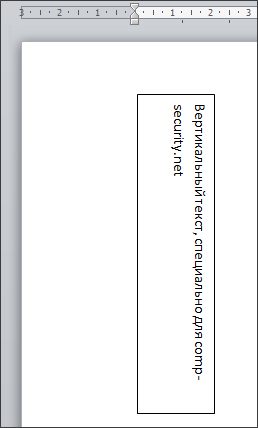
Creating vertical text in a table cell
This is the most commonly used way to create vertical text in Word. To implement it you will need to complete the following steps.  As a result of the described actions, vertical text will be obtained in an invisible table.

Using Labels to Create Vertical Text
If using a table is undesirable for some reason, you can use the “Inscription” tool. Step by step it will look like this.

In the end, we get a result that is not visually different from the first option.
Vertical text in a column
This method will create vertical text with horizontal orientation of the letters in it. This method is only suitable for texts on one line.
To implement it, you need to press the “Enter” button after typing each letter in the text. If there is a space between words, then “Enter” must be pressed twice. After this, all that remains is to adjust the line spacing so that the spaces between the letters do not look too large.

Not uncommon when working with Word program there is a need to make vertical text. This program can do almost anything with text. Therefore, even vertical text is not a problem for the Word editor. In this article we will look at several ways that will allow you to make vertical text in Word.
How to make vertical text in Word using captions
On the Insert tab there is a Shapes button. Using this button in Word document You can insert a variety of objects. Among them: arrows, lines, geometric shapes, and inscriptions. We are interested in the inscriptions.
Click on the “Shapes” button and select the first item in the drop-down list, which is called “Inscriptions”.
After this, you need to select the area of the document in which you want to make vertical text. After selecting an area in the document, a frame will appear within which you can enter text.

Enter the text you want in this frame. After that, on the “Format” tab, you need to find the “Text Direction” button and select “Rotate text 90 degrees” (or “Rotate text 270 degrees”).

The result is a frame with vertical text.

In addition, you can make vertical text in Word by simply flipping the block with the inscription. To do this, enter text and rotate the text frame to a vertical position using the green circle. To make it easier to flip the text frame into a vertical position, you can hold down the Shift key.

As a result of these manipulations, you should get something like this vertical text in Word.
If you need vertical text to be read from bottom to top, simply rotate the text frame another 180 degrees.
How to text vertical text in Word using a table
The second way to make vertical text in Word is to use tables. Create a table with one cell. This can be done on the Insert tab.

After that, enter text into the table and go to the “Working with Tables - Layout” tab. Here you need to click on the “Text Direction” button.

As a result, you will get a table with vertical text. If necessary, vertical text inside the table can be aligned using the buttons located next to the “Text Direction” button.
In this article I will tell you how to make vertical text in Word. The instructions are very simple, and my screenshots will help you figure it out. This feature can be useful in cases where printing a document requires text to be positioned vertically, or if the text is written in a narrow column of a table, where it does not look good horizontally.
Whatever your reason for this tutorial, here are two ways to make text vertical in Word. The first one is suitable for any place in the document, and the second one will only work in tables.
How to make vertical text in Word anywhere in a document
- Open Word and select the Insert tab.
- Click the “Inscription” button and select the desired type of inscription from among the possible ones or click “Draw an inscription”. For example, I chose “Simple inscription”.
- Now you have a “Drawing Tools” tab and in it there is a “Text Direction” button. Click it and choose one of three possible directions, two of them are vertical.
Now you know how to make vertical text in Word. All that remains is to tell you how to remove the border from the inscription if it is not needed. To do this, use the “Shape Outline” button and select white, then the frame will become invisible.
How to make vertical text in Word in a table
- Open Word with the desired table.
- Right-click on the cell whose text you want to make vertical and select “Text Direction.” If you need to make vertical text in an entire column or row of a table, then select the desired fragment and then right-click.
- In the window that opens, select one of two vertical text directions and click on the “Ok” button.

A wide variety of documents are created in Word, and the design can sometimes be unusual, for example, in terms of text arrangement. So next we will look at the frequently asked question of how to make vertical text in Word, and we will analyze at least three options for its implementation.
Most often, they prefer to rotate text vertically in Word using a table, in the cells of which you can arrange text in different ways. To do this, it is enough to even use a table of one cell, placing text inside it.
Next, to position the text vertically, you can use the menu "Text Direction", which can be found by selecting the table or placing the cursor inside it on a tab "Working with tables" in the bookmark "Layout". Each time you click on this menu item, the direction of the text in the table cell will change.

You can go the other way, right-click in the cell and select the item in the menu that appears "Text Direction". As a result, a window will appear in which you can make vertical text in Word. After this, all that remains is to customize our table, for example, change the size and hide the borders.


The next option is used much less frequently and involves using the menu "Text field". Using this menu, you can place a special area on the sheet and enter text into it, the direction of which can also be changed, as in a table. You can find this menu item on the tab "Insert".

After entering the text, you need to go to the tab "Drawing Tools", bookmark "Format" and clicking the menu item "Test direction" select the appropriate option or select an item at the end of the list "Text Direction" to call a special window, as in the case of a table.

This area can also be adjusted and the edges made invisible, and besides, this method is more universal, since settings can be applied to this area as to an object and placed in any part of the page.

IN latest version we will make vertical text in Word in one column, i.e. our text will be written vertically from top to bottom, one letter at a time. For this, the same text field discussed above will be used. Everything is done very simply, the text is entered, and then the area is moved to the left or right edge with the mouse and the text automatically begins to be arranged in one column. Then you will just need to add extra spaces at the end of the words, since the text will turn out to be continuous.