Dividing a large room into parts for neat zoning is easiest to accomplish with drywall. The material is easy to use, does not require special skills of the performer. Preparation and execution take a minimum of time. And the stylish finish allows you to create original interior plasterboard partitions for a practical separation of the space.
Preparing for installation
The contractor will need to select the type of dividing wall in advance. You can create both a one-piece divider with a door and a partition that only takes up half of the room. The first option is suitable for creating separate rooms, the second will allow you to select a recreation area and working area or create two separate ones from one children's room. Interesting photos interior drywall partitions will help determine the most suitable type and study the popular style.

The layout of the premises for the installation of the structure is carried out on the walls, ceiling and floor. Using the level, you need to draw those sections where the fasteners will be located. It is important to remember that you need to navigate according to the level data: walls, doors and windows can be located at a slight angle, which will lead to an uneven installation of a drywall partition.
Installation of fasteners and screwing GKL sheets
To start work, you should purchase dowels, profiles, screws and drywall itself. For ease of screwing the sheets, it is recommended to use a screwdriver. It will allow you to perform the installation efficiently and quickly. And to understand how to make an interior partition with your own hands, the following instruction will help:

1. According to the marked marks, guide profiles are fixed with dowels.

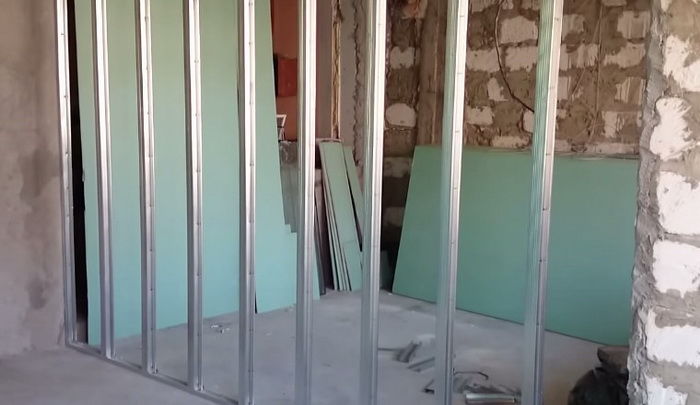

3. Fastening of sheets starts from the wall. Self-tapping screws should be located in segments of 15-20 cm. The hats should be sunk into the sheet and not protrude above it.

4. The joints of the sheets should be in the middle of the support, therefore, if necessary, the profile can be slightly moved.

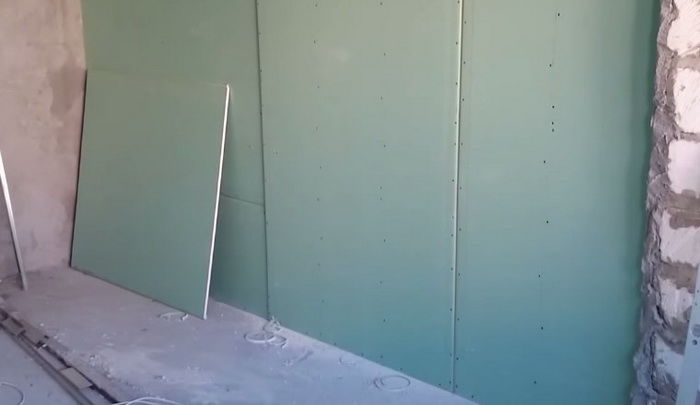

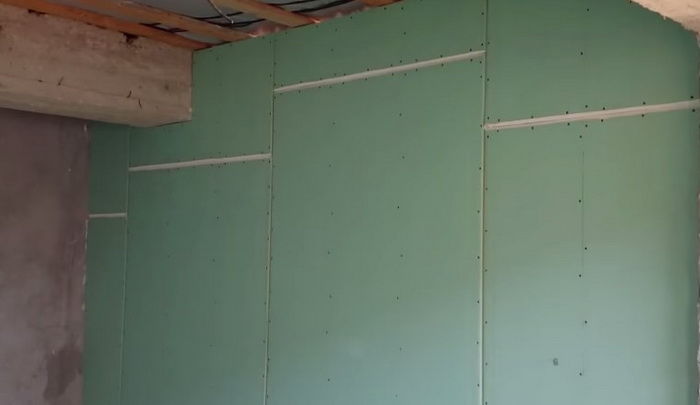
5. The last sheet usually needs to be trimmed to fit into the space. You can trim with a sharp clerical knife. Before screwing on the drywall from the second side, you need to fill the space between the profiles with mineral wool.

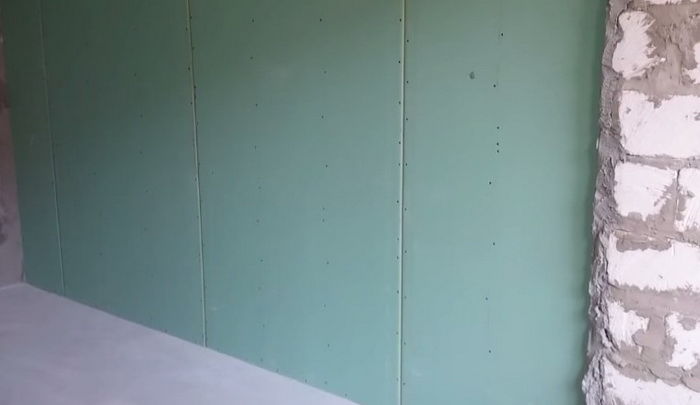
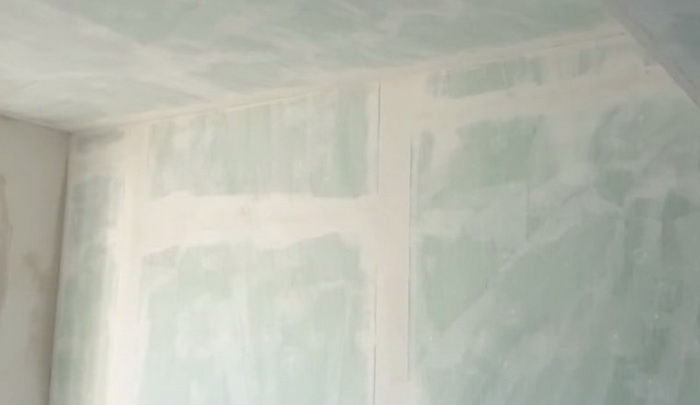
6. After finishing the screwing of the material on both sides of the structure, grout the joints with a primer.


7. After the grout dries, the resulting separator can be painted or coated. decorative plaster, adhesive film or regular wallpaper.
The time of installation of interior drywall partitions will depend on the amount of work. The easiest and fastest way to make small structures for zoning. But regardless of the size and features of the separator, its cost will be negligible.
Installation of an interior partition with a door
When creating a separate wall with a door, you need to modify the rack profiles into which the frame will be installed. A beam is inserted into the middle of the support, providing sufficient rigidity and strength of the structure. The addition is also inserted into the profiles located above the passage and in the threshold.
A high-quality interior plasterboard partition with a door should be carried out taking into account the load received by the separator. It is necessary to install to create a passage easy door... MDF products are perfect for this purpose.
Creating a unique element will take a little time and a minimum of financial investment. In addition to these recommendations, for high-quality work, you should also use a detailed video about the installation of interior drywall partitions. Precision of execution and correct preparation will help to build a safe and reliable structure that can serve for many years with careful operation.
DIY installation video of drywall partitions
Gypsum plasterboard PARTITION, double CD profile. Partition wall, plasterboard.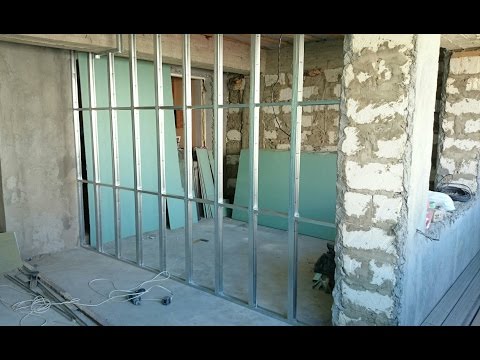
DIY plasterboard partition
Secrets of installing drywall. Installation of partitions and professional tools.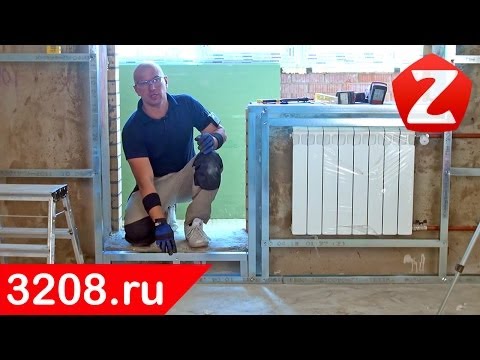
Renovation of an apartment is always associated with the loss of money, time and nerves. Some people start it and cannot stop for several years. They are busy little by little, they finish one part, start another - and so they can continue indefinitely. Saving money on repairs Now we will not talk about reducing the repair time, but about saving. Think carefully about what you want to receive after the completion of the renovation. This is to ensure that in the process not to abandon everything halfway, wasting money and time. Have you figured it out? That is great. Now measure the room and make a list of everything you need to buy. All materials must be bought at once before starting the repair. Find out in advance where and in what building stores discounts, promotions, etc. Before purchasing materials, ask your friends, as it were between times, if any of them has a discount card of the stores you need.
As you know, the bedroom is the most isolated room, which is a room for rest, sleep and privacy. How to place furniture in the bedroom Undoubtedly, everyone tries to make a bedroom according to their tastes and needs, to fulfill all their desires and ideas. But only professionals will help you figure it out. With competent and careful design, the bedroom can be turned into a cozy corner of your home, in which an atmosphere of comfort and pleasure will reign. This material will help you create the necessary atmosphere in your favorite room. A standard set of furniture for placement in a room are: an armchair, a bed, bedside tables, a chair and dressing table, desk(if there is nowhere else to place it), mirror, separate or built-in wardrobe.
We all remember this wonderful age, this bright time full of ideas, hobbies and all kinds of hobbies. Unique room design for a teenager When you are between 13 and 20 years old, you definitely want to be unique and in line with the latest fashion trends. Of course, this desire will not leave you throughout your life, but the time of adolescence is a time of change. Therefore, the design of a teenager's room should easily change depending on the mood and, at the same time, the change should not be a huge cost and hassle. Each teenager has his own room - a place where he can be himself. A place where he can invite his friends and demonstrate his uniqueness. Therefore, it is necessary to take into account, first of all, his interests during the furnishing and decoration of the room.
Designers know that it is quite difficult to create a comfortable and, at the same time, comfortable interior in one-room apartment... True, it is not necessary to be upset prematurely, first of all, you need to clearly understand what the owner wants to have in the apartment, what areas in it will certainly be needed. Registration of a 1-room apartment Before starting work on the arrangement of the interior design, it is necessary to note the primary tasks of the room. First of all, it is a bedroom where the owners of the house will rest. In most cases, another and at the same time key function for the space of the room will be the reception of guests and acquaintances, that is, it will also be the living room. In addition, when guests come, the space of the room should be at the same time a refectory. Therefore, the area of the room should be symbolically divided into two separate zones - an area for relaxation and a guest area.
At this time, the decoration of premises in different types designs that can often express a national trend. Japanese style Among the huge number of available fashionable styles of interior decoration, a special position long time occupies the so-called Japanese style, preference is given to it not only for decorating living spaces, but also for forming an extraordinary appearance bath rooms.
Teenager, boy or girl aged 13-19. Not an adult yet, but not a child anymore. Down with toys and forward to adulthood. How to furnish such a room and what features should be taken into account, who chooses the design - parents or a child? So, your child has grown up and is no longer a toddler, but a teenager who has a sense of his own importance. It's time to change the interior of the room to something "adult" and "cool". Room for a teenager First, you need to think about which room design would be more to your child's liking, because if parents can dream of classic style, then the teenager will easily call it "old-fashioned", but, nevertheless, he will have to live in this room, and not you. Therefore, we choose, listen to the opinion of the teenager, discuss and come to some common decision based on the points below.
Having decided to build an additional wall in an apartment or house, which serves as a dividing partition, many decide to use drywall as the main material, since it has many advantages:
- allows you to quickly perform installation;
- even with minimal effort, the result is absolutely flat surfaces;
- has a low weight;
- possesses high rates of sound insulation and fire resistance;
- having a small thickness, it makes it possible to hide communications.
Construction of an additional wall – a rather simple process that can be entrusted to professionals or performed independently, having previously familiarized yourself with all the nuances of erecting such a plasterboard partition. How to make interior walls? Video or photo instructions - best helpers in solving this issue, thanks to which you can not only familiarize yourself with the installation rules, but also see how exactly to carry it out.
A do-it-yourself plasterboard partition is built from plasterboard directly, CW rack profiles and UW guide profiles, which are attached to the floor and ceiling. For reliability, the profile thickness must be at least 0.55 mm, otherwise the partition may be deformed during operation. Before buying the required material, you first need to calculate how much of it is needed to build interior drywall partitions. The dimensions of the room in these calculations are the main role, since it depends on their values how much you need to purchase sheets of drywall and metal profiles. Also, the amount of material purchased is affected - will the wall be two-layer or single-layer. If you are interested in a more powerful version of a partition made of foam blocks, then we have one. Also, do not forget to read, where another option for erecting a partition is described.
Do-it-yourself device and installation of an interior plasterboard partition
1. Before making a plasterboard partition, you need to finish all wet work in the room.
3. On the back side, on the UW profile, we glue a soundproof tape, which will damp vibration during operation.
4. The UW profile is trimmed to the required size, drilled and stuck to the floor using screws and dowels 6x60, installed at a distance of 60-80 cm from each other.
5. In the same way we attach the UW profile to the ceiling.
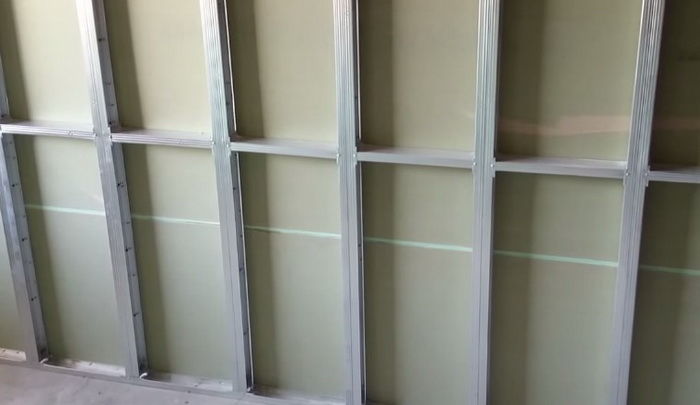
Since the most popular device of plasterboard partitions in an apartment implies the vertical installation of solid sheets, therefore, we also make the frame vertical from CW profiles, which are fixed to the UW guide profiles running along the floor and ceiling.
6. The CW profiles are shortened by 10-15 mm relative to the height of the room.
7. The extreme adjoining CW profiles must be glued on the reverse side with tape and fixed to the walls.
8. The rest of the CW profiles are installed in 60 cm increments and fixed with a cutter.
9. We sew one side of the partition using a drywall screwdriver, which does not allow the self-tapping screws to be heated in the drywall.
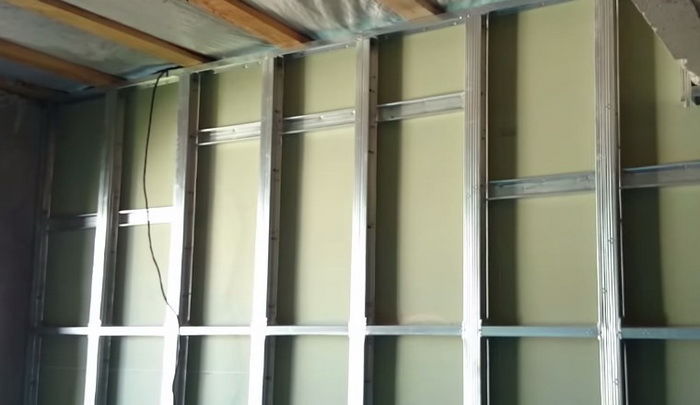
10. We carry out the distribution of wires in the free niches of the structural spaces of the partition.
11. We fill the niches of the room plasterboard partition with an insulator. It is recommended to use mineral wool slabs or roll insulation as an insulating material. The thickness of the insulator must not be less than the thickness of the niche, otherwise it will slip and will not perform its functions. Insulating layer we put it so that there are no gaps between the plates. It is better to use whole pieces, as trimming the insulating material will reduce the sound transmission capacity of the partition.
12. Install drywall sheets for sewing the second side of the partition on drywall linings.
13. Sew up the second side of the partition with gypsum plasterboards, securing them with self-tapping screws with a step of 20-25 cm for single-layer sewing or with a step of 50-60 cm for two-layer sewing.
14. We measure all the missing parts from the drywall with a tape measure and cut with a drywall knife. We process the cut edges with a drywall rasp.
15. For increased strength of horizontal seams, we install pieces of the profile as bridges. We do not screw the screws of the self-tapping screws into the corner of the sheets, but retreating from the corner of 3-5 cm, but from the edge of 1-1.5 cm, so that the core does not crumble.
You can sew up the partition in two layers, then it will have a higher quality:
- better to absorb sound;
- have better bearing capacity, rigidity, and in some cases even fire resistance.
16. When performing the second layer of sewing, we measure all the wires and transfer their dimensions to a plasterboard blank, thereby determining the exact place for making holes for the wires. This hole is made with a special hacksaw.
17. Pull all the wires through the slots and install the plate. We sew the second layer with self-tapping screws with a pitch of 20-25 cm so that the vertical and horizontal seams of the second layer do not coincide with the seams of the first layer. We install the plates in a staggered manner relative to each other or with a gap of horizontal joints by at least 40 cm.