- Pros and cons of such an arrangement
- First steps: where to start the process?
- Features in 4 stylish walls
- Some features
- Wallpapering is also an option!
- How to make a beautiful floor?
- Furniture and more
- Budget kitchen: interior and its features
The kitchen is the most popular room in the house. Clean, new, cozy and modern, it improves appetite and mood, is conducive to family and friendly gatherings, and promotes the development of culinary imagination. The kitchen gets dirty faster than other rooms, so its renovation should be approached with special responsibility.
Before starting renovations, it is necessary to draw up an action plan: draw a project for the future kitchen, think through the interior design, and calculate the necessary materials.
Today everyone can bring stunning beauty to their kitchen: even those who have no experience in renovation matters. This article will help you make a high-quality budget project.
You may think that any renovation requires a lot of money. This is wrong. There are several ways to reduce costs to a minimum. So, independent budget renovation. Shall we begin?
Pros and cons of such an arrangement
Budget renovation will not only save money, but also help you gain invaluable experience.
First of all, kitchen renovation is about saving money. Not everyone can afford to hire a construction team these days. In addition, she cannot always fully (down to the subtleties) understand what exactly you need. And the feeling that you “made” your kitchen yourself is simply inspiring!
In addition, budget repairs, design, and restoration are useful for those who lead a passive lifestyle. Repair is like a sport: movement, physical activity, and the work of thought is considerable. And the result will delight you for many years!
Do-it-yourself kitchen renovation also has its pitfalls. A person without experience may purchase the wrong building materials. Or the repair will take a long time. But this can all be fixed.
Return to contents
First steps: where to start the process?
Kitchen renovation, like any renovation, begins with a project. If you are not a born designer, entrust this work to a professional, and in practice you will implement his ideas yourself.
A kitchen should not only be beautiful, but also practical and functional. If all items are positioned correctly, you will be comfortable and therefore less tired while cooking. So, convenience comes first, and then external beauty. It’s better, of course, to order furniture in advance and already make the kitchen “for it” so that everything is in harmony.
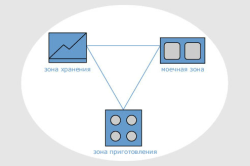
Mark the places where the stove, sink, refrigerator, cabinets and cabinets will be located. What is a work triangle? This is the layout: in one corner there is a stove, then there is a table and a sink, and then a refrigerator.
Choose the right color scheme for your kitchen with soft tones.
Remember that saturated, too bright colors excite nervous system.
Fashion trends? Of course, give them their due, but don’t go overboard with extravagance. In the kitchen, first of all, all family members should feel comfortable. The best flowers(shades) for this room, psychologists consider:

Bright and rich colors excite the nervous system, therefore color scheme Kitchens should be tailored to the shape and size of the room.
- beige;
- cream;
- brick;
- pearl;
- salad;
- citric;
- light grey.
For “juiciness” it’s good to add beige wallpaper and a light set with catchy accessories. And where you will cook, wash dishes, and put cutlery, there must be good lighting. Therefore, take care of high-quality electrical wiring. Once the design is ready, you can begin leveling the walls, floors, etc.
Return to contents
Features in 4 stylish walls
Do you already feel pleasant impatience, renovation excitement and the smell of paint? First of all, we wish you inspiration!
Walls are the largest surface, the “face” of the kitchen, for which there are many types of design. Paint or seal? Today on the building materials market you can find everything you need and inexpensively to repair the walls of your kitchen. Ultra-modern finishing materials Don’t take it into account, because we are talking about a budget kitchen.

Painting is the most easy way kitchen renovation that does not require complex tools and special knowledge. First, prepare the walls for renovation by completely removing the previous finish. If your home is made of concrete structures, get to the concrete. Afterwards prime the walls well.
After the walls are dry, start leveling them. To do this, take coarse putty. What layer should I apply the material? The thickness of the layer will depend on the curvature of the walls, on the difference in their plane (usually no thicker than 5 cm). Then dry the walls again and apply a primer solution. And again you wait for it to dry.
Next, apply a thin layer of putty to make the wall surface look smooth. To do this, you already use a special fine-grained putty. Dry this layer as well. Now you need to carefully sand the walls using sandpaper so that there are no errors left on them - marks from a spatula or lumps of material.
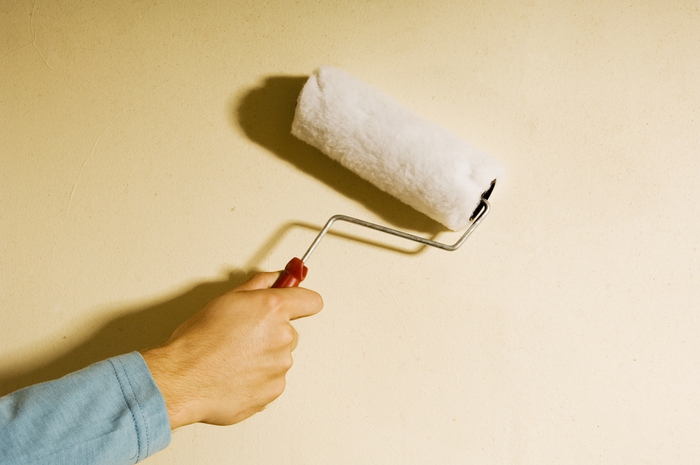
Water-based paint is applied in several layers using a paint roller.
And the last preparatory moment is priming the wall for painting, which then needs to be dried again. This is how painstaking and time-consuming it is to prepare walls for painting: you also need to be patient, because it takes 5 hours for the primer to dry, and up to 24 hours for the putty.
The process of painting a kitchen with your own hands is much more pleasant and faster. Recommended to use water-based paint: applying it is a pleasure! Arm yourself with an ordinary paint roller. Let us remind you that you should paint with water-based emulsion in several layers (2 or 3). In this case, the next layer can be applied immediately, without waiting for the previous layer to dry.
Return to contents
Some features
As for the last coat of paint, it should be applied in vertical stripes. If you see that there is a need to apply 3 layers, then the 1st and 3rd layers are applied vertically, and the 2nd – horizontally. Remember: all strokes are applied overlapping each other. To paint the kitchen of your dreams, you cannot use foam rubber; ideally, you need to use a medium-shaggy fluffy roller.
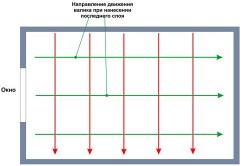
Paint application scheme: red lines - the first layer, green lines - the second layer.
The ceiling is the most problematic part of the room. As usual, you start with basic surface preparation. If there are areas affected by mold, treat them with a solution of fungicide or household bleach diluted in water.
Traditionally, the ceiling is painted in white so that it reflects maximum quantity light in the kitchen. The optimal brush length is 100 mm. Start from the edge closest to the window. If the ceiling is high or there is no stepladder in the house, a roller with a long handle will help out. With its help, you can paint while standing not on a stepladder, but on the floor. Use a 180 mm roller. Start near the window and apply the paint in wide, parallel stripes.
Tip: to take a break during painting, wrap the roller sleeve in plastic bag to prevent the paint from drying out.
Return to contents
Wallpapering is also an option!
It is advisable to buy washable wallpaper for the kitchen - one that can be wiped from time to time to remove dirt. If you choose wallpaper with a pattern, you will have to be extremely careful and precise when gluing it. After all, if you don’t adjust the pattern located on different strips of wallpaper, everything will go down the drain!
Just like before painting, the walls need to be prepared before wallpapering. Next, cut the wallpaper into strips of the required length (wall height plus margin - 10 cm). Prepare the glue according to the instructions on the wallpaper packaging. Glue the wallpaper, leveling it. If excess glue creeps out from under the wallpaper, wipe it off with a clean rag.
The most difficult thing in this matter is the corners: apply 2 strips overlapping each corner, make a vertical cut along the corner, remove excess pieces of wallpaper, apply glue under the edges and level it. This good old method can be done by anyone, and there is no need to invite any experts.
Paintable wallpaper has worked well in the kitchen: it can be repainted several times. Laying tiles on the wall is also popular, which is an element of kitchen decor and can complement both painted walls and walls with wallpaper.
Tip: paint the pipes central heating in the same color as so that they do not stand out. Modern all-purpose paints handle heat better than emulsion paints.
Today we’ll talk about how to create a pleasant atmosphere of comfort and hospitality in the kitchen, and look at another selection of interior photographs. Kitchen renovation is a joyful and at the same time expensive undertaking. The issue of its redevelopment is usually approached seriously, without haste, involving all family members, and sometimes even friends and acquaintances, in the discussion. How could it be otherwise, because this is our family hearth, our favorite place in the house.
Due to lack of space, today many are scrapping partitions and. From the point of view of space optimization, this is a good solution. But aren't we losing? special atmosphere a cozy little kitchen world, so familiar and dear to our families?
They say that the kitchen is the soul of the home. Perhaps these are too pompous words, and yet, you have probably noticed that each family has its own, with special smells and moods. The individual atmosphere is especially felt in old kitchens, but disappears after renovation. So the housewife faces another task: to breathe life into the new kitchen, to create a new family home.
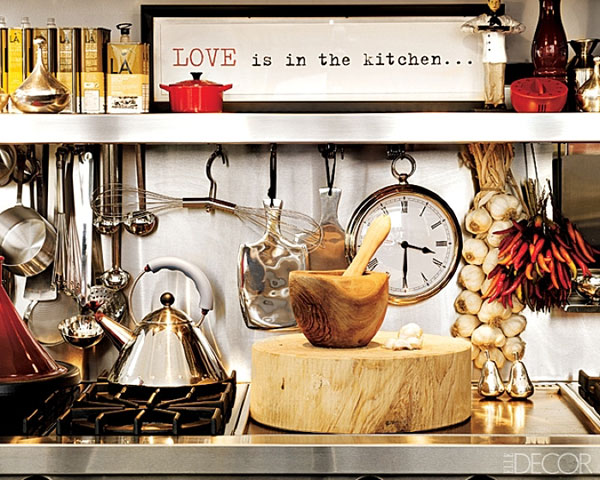
Many of our compatriots, when choosing kitchens, prefer ones with shiny plastic surfaces fashionable colors(purple, orange, red). Such furniture is beautiful in the store, it looks stylish and seductive. And even after installation in the apartment it should not disappoint the owners. There’s just one problem: among family members there are rarely interior designers who could support fashionable kitchen in everyday life. So various clay and porcelain figurines and plates, wickerwork and sunflowers, pumpkins, onion bunches, and other decorative items that do not suit this kitchen in style, but are well-established in the traditions of our people, appear on it.
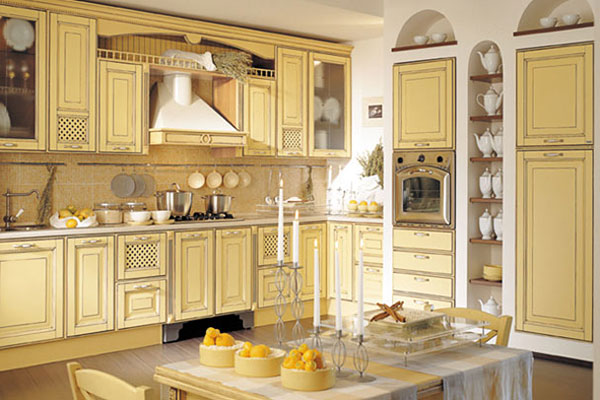
It turns out that the housewife tries to create comfort in ways known to herself, but it only ends up worse. But if we had chosen a classic kitchen - natural shades of wood or white, in country style everything would have been much simpler and, most importantly, to suit your heart. But don't despair - it doesn't matter what your style is. new kitchen, the main thing is to try not to deviate from it, adhering to a single line. If you can’t handle it yourself, turn to designers for help, it will be cheaper than wastingly buying beautiful things and then rejecting them due to inconsistency.

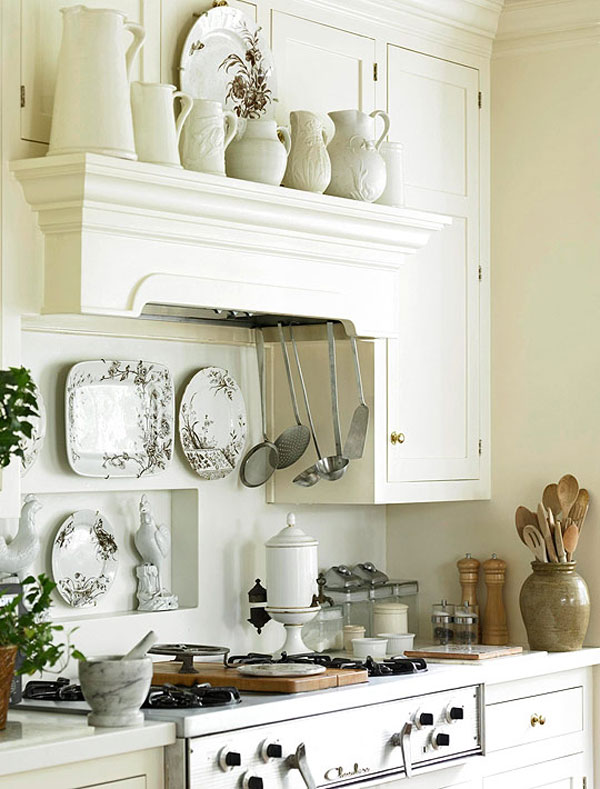
Included kitchen furniture usually include glass cabinets and illuminated display cases. Filled with beautiful dishes, they greatly decorate the kitchen and add coziness. Unfortunately, the owners small apartments in the struggle for every centimeter of usable space, we are forced to abandon them in favor of closed functional cabinets.
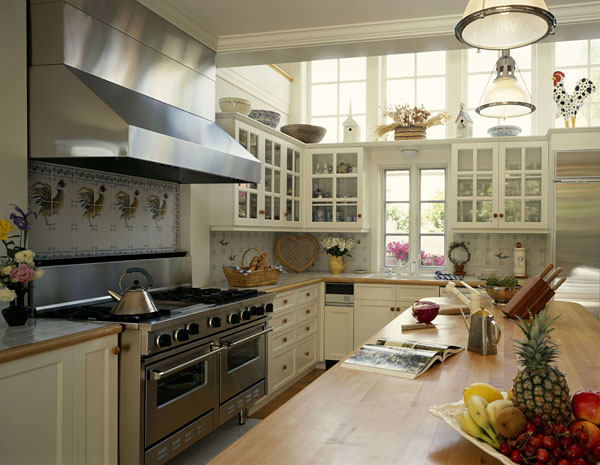
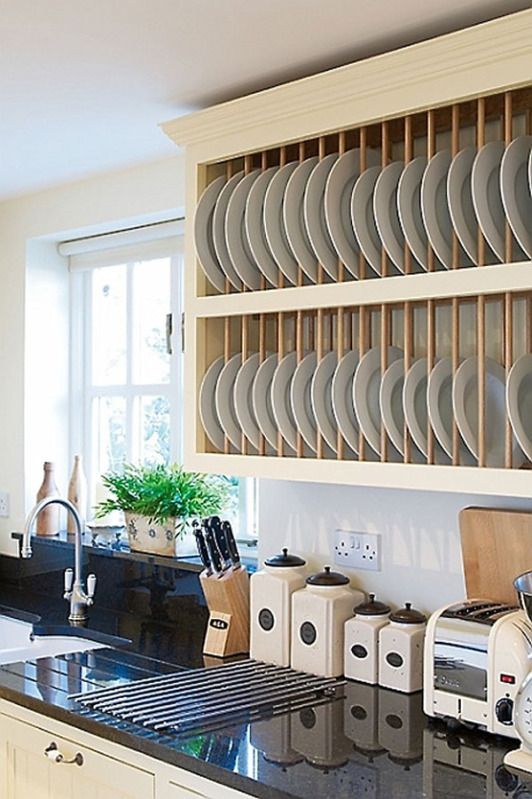
If your kitchen is small, you can make illuminated glass display cases in the second row, above the wall cabinets (as in the photo below), they will look very nice. A good option is open drying racks and stands for plates: they refresh the interior well and give it a residential look.

![]()
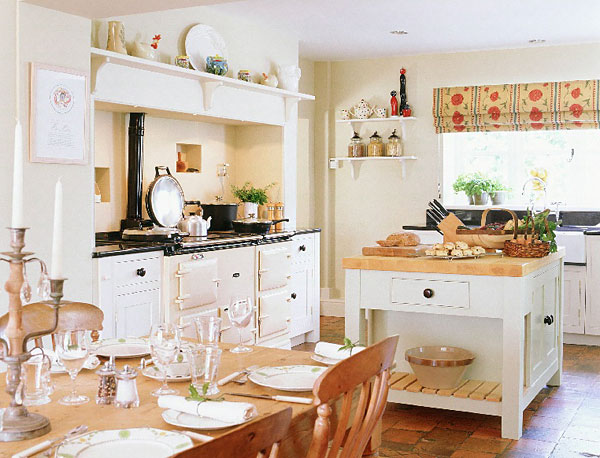
A favorite place to place decorative elements in a small kitchen is an open area above wall cabinets; here you can put anything (vases, jugs, decorative plates, simple figurines) without harming the usable space.
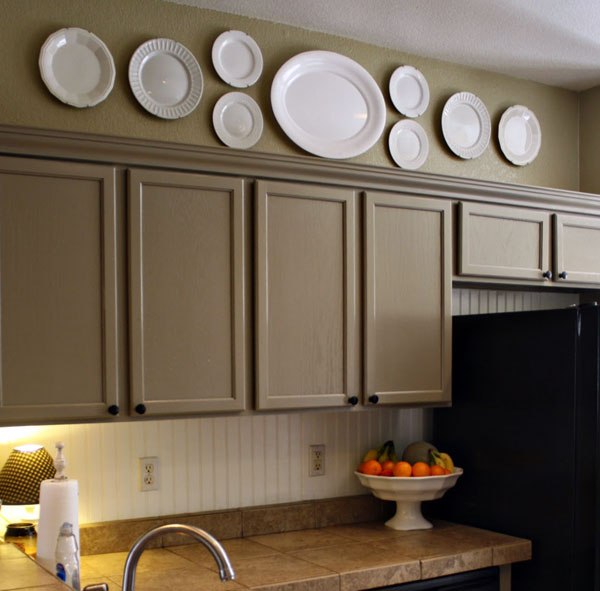
Other techniques are also used to decorate the space under the ceiling; for example, you can add a touch of individuality to the kitchen design using paintings, wall plates, and artificial flowers.
![]()


In photographs of interiors, we often see fresh flowers in vases as decorative elements. It is clear that for everyday life this option is not suitable, but you can always come up with some alternative, for example, citrus fruits in nets or bright vegetables.
Elena's story from Soligorsk:
I thought for a long time whether to send my kitchen to the competition or not, because I understand that we will not be able to compete with kitchens for 5-7 thousand dollars, much less for 10-12. But in the end I decided - maybe someone will get ideas for their kitchen.
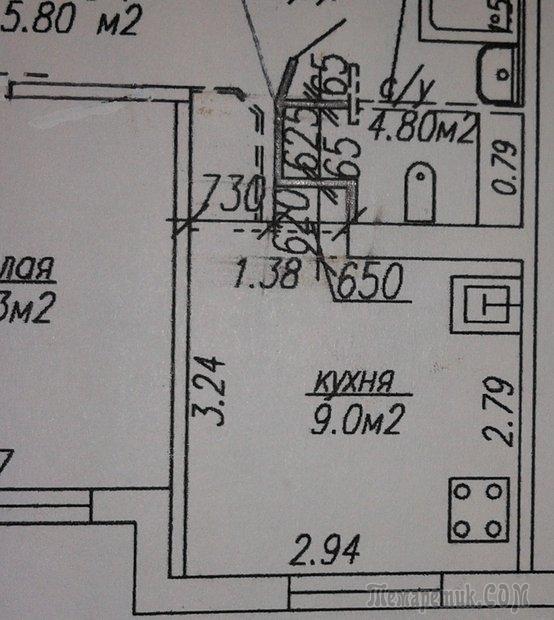
The apartment is in a standard socket. Kitchen area 9 m2. The renovation was done in 2015.
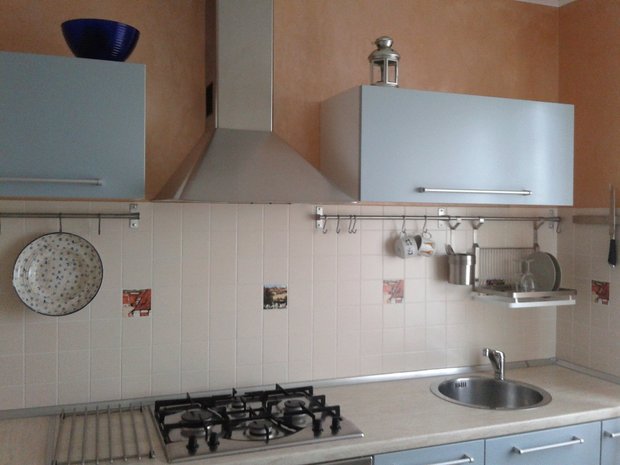
Kitchen set decided not to change, although he is already 11 years old. I like the color of the facades, and the condition of both the facades and the fittings, despite such a considerable age, is very good. We decided to change only the countertop.
We bought the kitchen at Ikea. I foresee comments like: “Ikea again.” And yet, when I started to get acquainted with the prices for kitchens, accessories, etc. in salons and stores, I realized that I didn’t want to overpay at all. A kitchen of a similar configuration with painted MDF facades was offered to me in one of the showrooms for more than 2 thousand dollars (maybe the prices are different now, I don’t know). Therefore, I chose Ikea for the price-quality ratio. And time has confirmed that I was not mistaken in my choice.
I bought the set like this. I opened the Ikea website and used the Kitchen Planner program to design the kitchen I wanted. They brought it from Poland. It came complete with internal fittings, handles, carousel for corner cabinet at 1 thousand 200 dollars. My husband did the assembly and installation.
I didn’t specifically plan a lot of wall cabinets, I limited myself to two horizontal ones. This allowed us to keep the kitchen space free. A corner lower cabinet is sufficient for storing all sorts of small items.
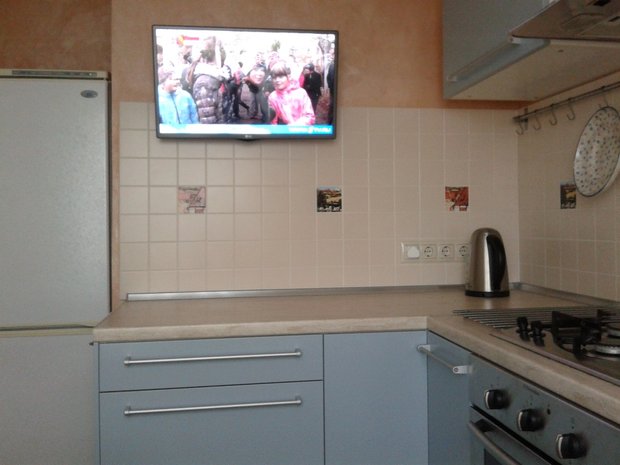
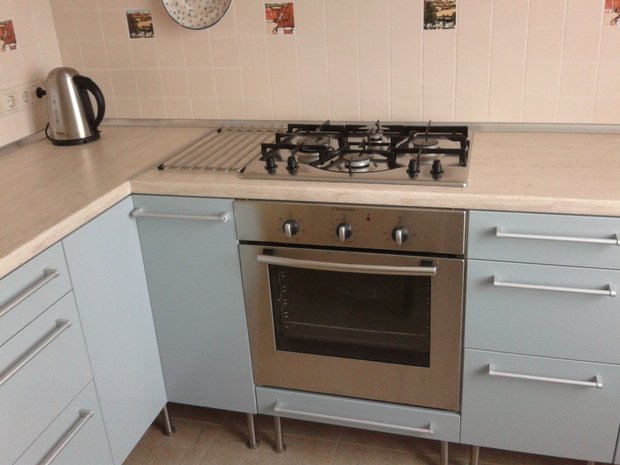
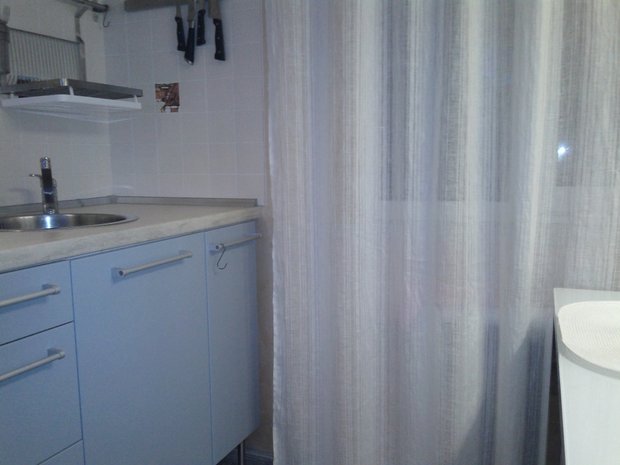
Household appliances didn't change either. The stove, oven and hood suit me quite well. But the refrigerator is the first in line to be replaced. It was placed in a specially designed niche so that it would not steal space.
All the work (construction, finishing, etc.) was done by the husband himself. Changed the wiring, installed sockets. The sockets were chosen by Legrand, the color was ivory.
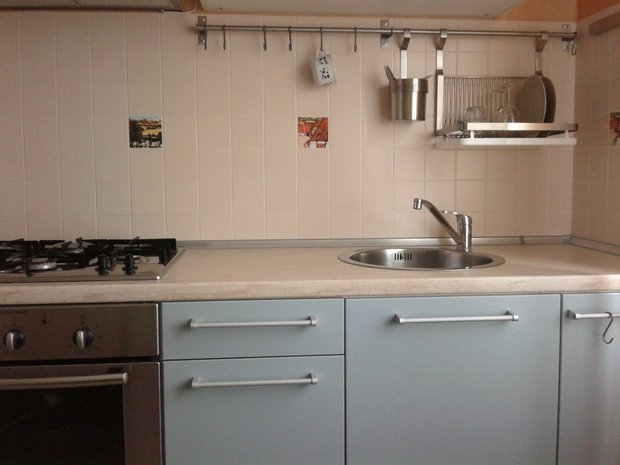
When choosing tiles for the backsplash, I relied on the color of the facades. I really love the combination of blue and beige, so we chose light beige Asti tiles produced by Keramin, size 10x10 cm. For the floor we chose ceramic granite tiles that matched the tone of the apron.
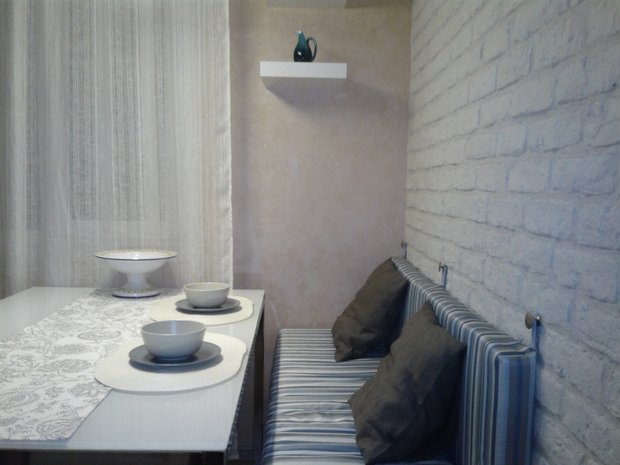
There is decorative plaster on the walls. It can be washed with any detergents, which is very practical. The salon advised us to Stucco-Decor DI PERLA from Caparol; this plaster can be applied independently without any skills. My husband watched a master class on YouTube, practiced in the niche for the refrigerator (it won’t be visible there if everything doesn’t work out the first time) and did an excellent job.
The color was chosen to be brighter than the tiles and facades, so that it would not be completely boring. The silver mother-of-pearl base was tinted red in the salon.
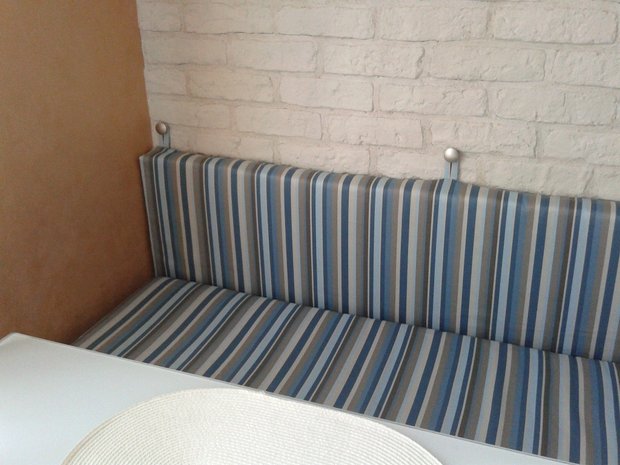
I wanted to lay white decorative brick on the wall where the sofa would be. Maybe it’s already hackneyed, but I love brick in the interior. We bought a “medieval” one from “Feudal”.
The tabletop was originally black, or rather “black stone”. They replaced it with beige and matched it to the tiles.

Wall accessories - “Ikea”, “Grundtal” series.
My husband made the hood box himself, since the hole in the wall is located at some distance from the corner, and he absolutely did not like the adapters to the plastic box. From the finished straight box, he cut out the necessary blanks and soldered them using metal mesh and a soldering iron (much like how car bumpers are repaired). Then I filled it with automotive putty, sanded it, primed it and painted it with the same paint as the ceiling. For the ceiling and box we used latex paint “Snezhka”.

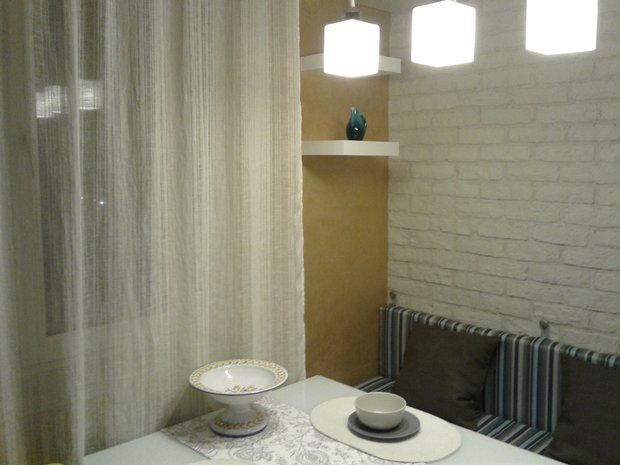
The table was brought from Ikea before the renovation was completed. Table with glass top - on a chrome frame. Initially I planned to buy chairs with metal frames to go with it. But life made adjustments: my husband and I went to choose chairs, went into a furniture hypermarket on Matusevich Street and in one of the departments where solid pine furniture produced by Dipriz and MMC is sold, we saw a white bench. I sat down on it, inhaled the smell of pine and... the bench went with us. Now I will change the table to a wooden one, since the one that is standing now does not quite suit the style.
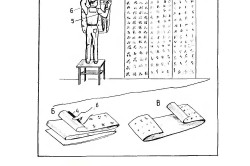
For the bench, I made a soft seat and back from foam rubber, covered it with padding polyester and linen fabric, then sewed a removable cover. For the cover I used a tablecloth that had been lying on the mezzanine for three years. So it came in handy. The stripes on the cover matched the color of the facades and tabletop. The backrest was hung on the wall using furniture handles. I sewed two pillows to make my back comfortable. Cushion covers are made of 100% linen.
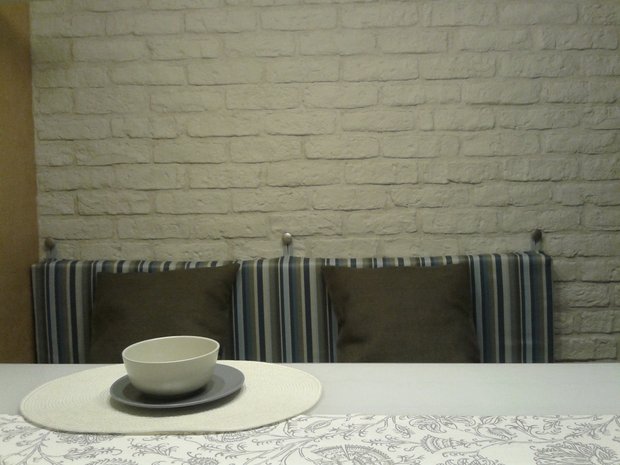
There will also be two white ones near the table wooden chairs. They're on their way. Also in the process of production are replacement covers for the sofa in light beige with a white pattern. When I want to update the interior, I just change the textiles.
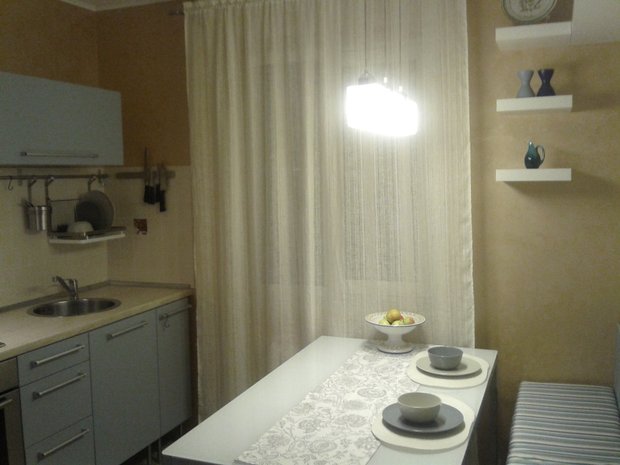
A triple suspension was placed above the table. It was brought to order from Ikea. Including delivery it cost 450 thousand. The lamps in the suspension are LED.
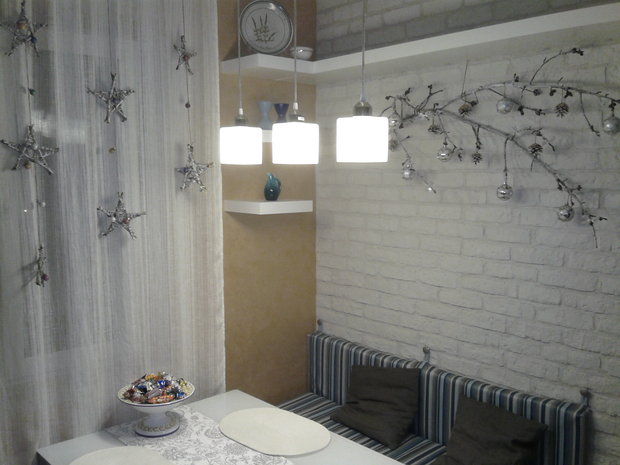
The shelves on the wall are also Ikea.
For the curtains I used Orsha curtain linen in a milky beige color. In general, I really love linen for its environmental friendliness and noble appearance, I use it wherever possible. Initially I planned to do a pick-up, but my husband and daughter talked me out of it. They love the way the light diffuses softly through the fabric. The curtains cost $10.
There are still some little things that need finishing: hanging posters over the sofa, putting a sisal rug on the floor in the dining area, lighting the tabletop, wicker baskets on the shelf. But overall everything turned out the way we wanted. And we feel very cozy and comfortable in our kitchen.
Approximate costs (in dollars):
- Kitchen set - 1 thousand 200.
- Wall accessories - 80.
- Oven, hood, hob - 620.
- Table - 120.
- Bench "Boston" from "Diprise", seat - 110.
- Shelves - 50.
- Curtains - 10.
- Decorative plaster and soil - 100.
- Tile for backsplash and floor - 95.
- Decorative brick and coarse-grained fugue - 110.
- Cement, putty, floor screed mixture, tile adhesive - approximately 120.
- Sockets and switches - 50.
- LG TV with a diagonal of 28 inches - 340.
Total: 3 thousand dollars.


